when I got my new table saw, one of the things I had to do away with was my permanent miter saw bench. I’ve never used my miter saw for much more than cutting stock down to rough size. However I could never do with out it, because cutting long boards to length on the table saw is not very save, because of how hard large boards are to control. Thus I decided I needed some form of miter saw bench/stand. I looked at several models, and I rejected all of them, because they were poorly built or had no out rigger legs.
Since buying a stand wasn’t an option I decided to design my own. Below is what I came up with, it’s made from roughly $30 of SYP construction lumber. Continue Reading…
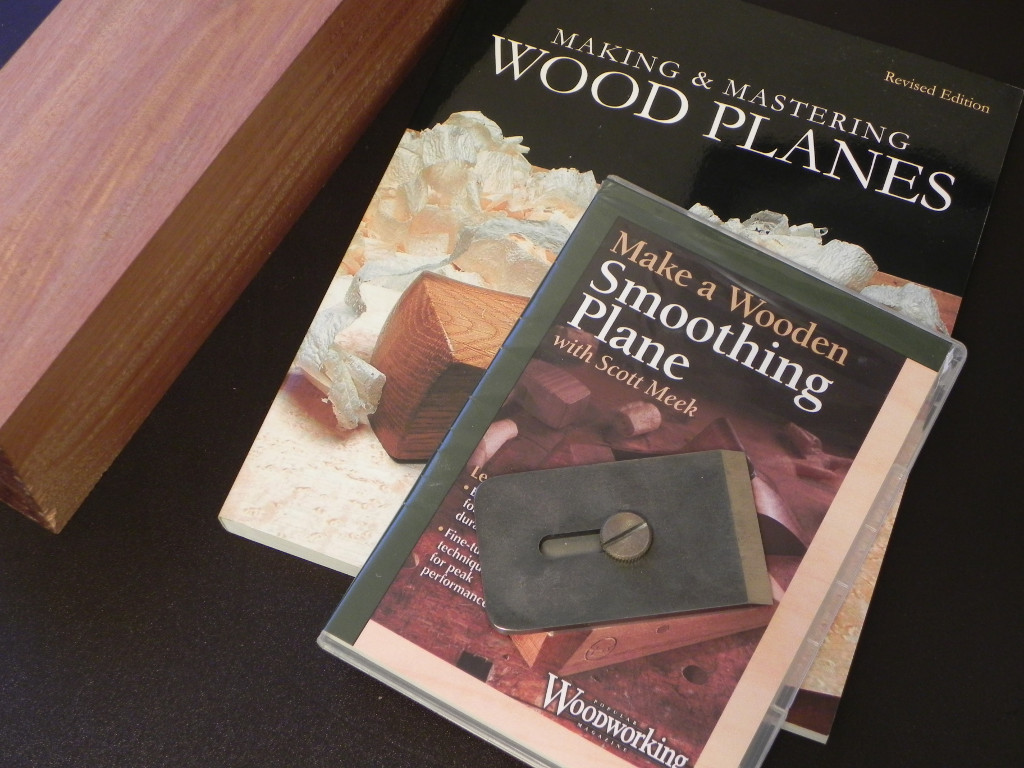
Here in central IL we’ve had the coldest winter in over a decade. Thus, in the last month I’ve spent about 5 hours total in my shop. Since I’m the type of person that goes stir crazy if I’m not doing something that’s challenging me mentally or physically, I’ve been doing a loot of reading, and planing for future projects. One of the things I’ve been wanting to do for a while is make a wooden hand plane. Iv’e read David Finck’s Making & Mastering Wood Planes, and I’ve purchased a 2″ Hock Iron in perpetration for making a plane some time this year.
To give me my woodworking fix for the week, I decided to buy Scott Meek’s Make a Wooden Smoothing Plane. The video had a lot of good info about how Scott makes his planes. Parts of the video progressed a little slow for my taste, but I expected as much when I saw the video was 149 minutes long. To be fair, this is Scott’s first video that I’m aware of, so he definitely deserves a by when you compare him the likes of garret hack and Philip C. Lowe, who’ve been teaching and making videos for years. The one thing I wish Scott had focused more on, was the harness and movement of various wood. while I have never made a plane before, I know a decent amount about wood, and it seems to me people use the wrong woods when making planes. Overall I thought the video was very well done, and well worth the $25 I payed for it.

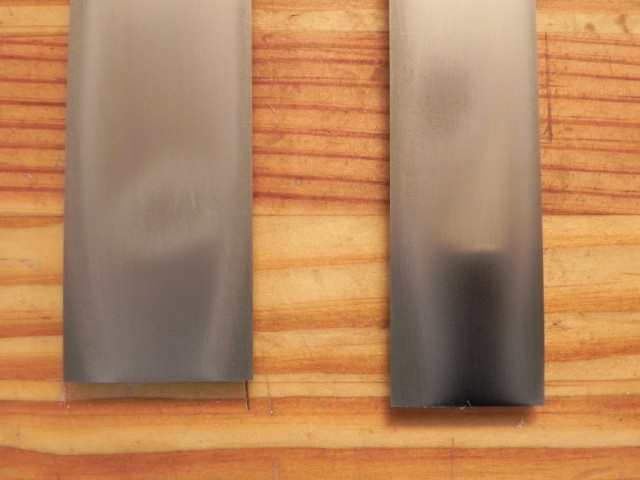
One of the things I got around Christmas time was a set of the Narex pairing chisels from Lee Valley. It took some time to get around to flattening the backs and sharpening them thanks to mother nature keeping me really busy. The flattening process was pretty easy for all the chisels except the largest two. In the picture below you can see halos on both the chisels. It took about 30 minutes of honing each to get them this flat. They are more than flat enough to use, but aren’t optically flat yet. I’m sure the’ll get there after a few honings, but for what they cost, they are well worth the price.
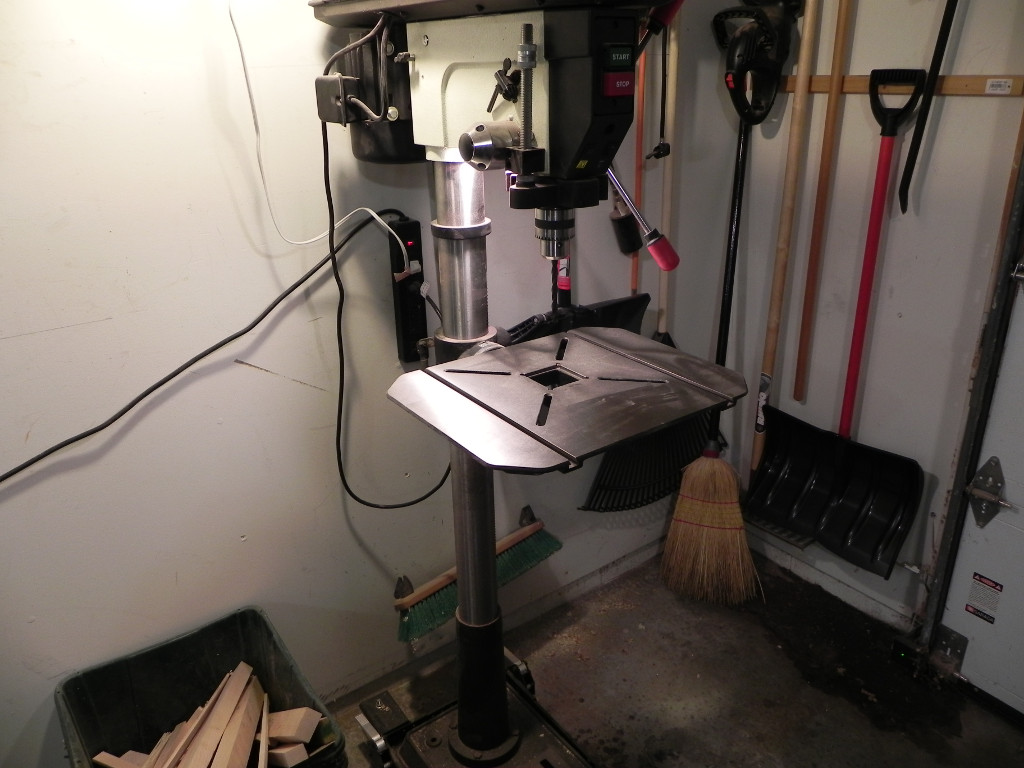
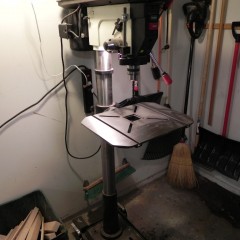
Until mid August I had a 12″ bench top drill press in my shop, that I got as a college graduation gift from my dad. It had a powerful motor, but like most bench tops a small throat capacity. Because of the limited throat capacity I never built a table for it. When it gave up the ghost, I replaced it with a Jet JDP-17DX, and immediately added a table for it to my to-do list.
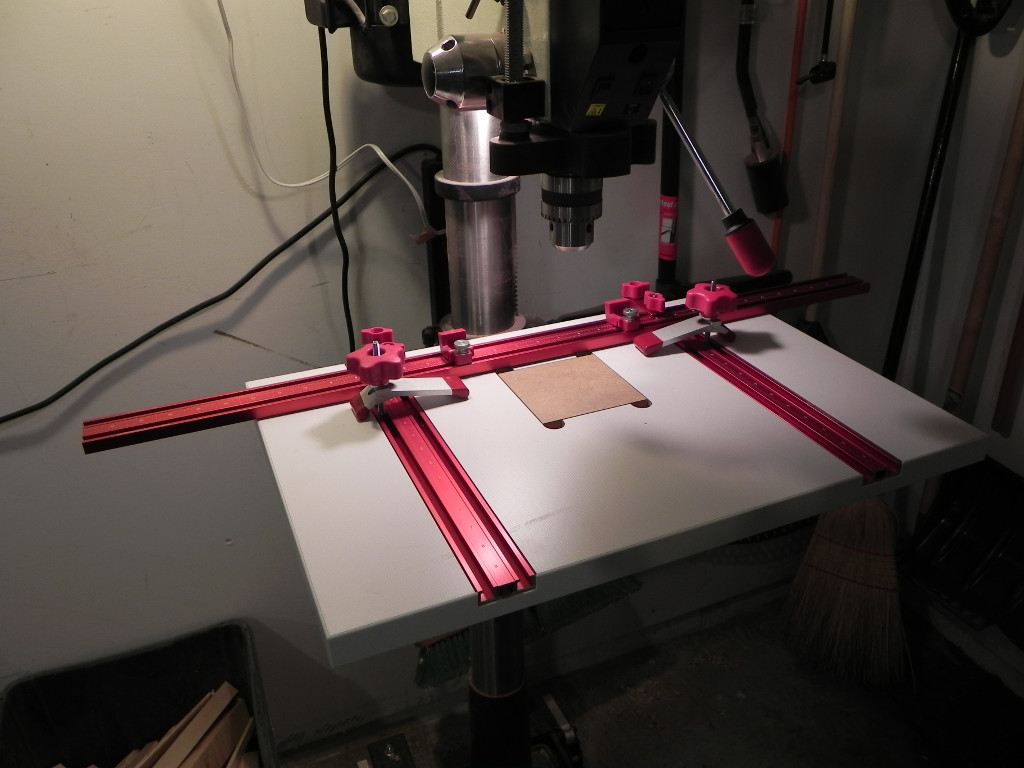
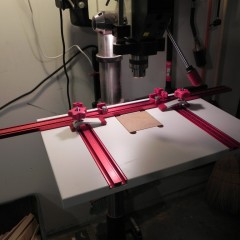
Fast forward to last weekend, and the table reached the top of the list. After settling on how I thought I was going to build the table, I went shopping for supplies. The first stop was the woodworking store to pick up some t-track & star knobs to go with it. As usual I browsed the lumber racks, & hand tools looking for anything new or interesting. I usually avoid the big power tools, but for some reason I decided to look them over anyway. After a few minutes I worked my way over to the drill press section and came across a Woodpeckers drill press table. After playing with it a little bit and seeing it was on sale for $119 I decided to buy it instead of making my own table.
I probably could have made something roughly equivalent to it for half the price, but right now I value my time more than a few extra dollars in my pocket. Since bringing it home, I’ve played with it some and the only thing I don’t care for are the work piece hold downs. They’re a good design but frankly I doubt I will ever use them, because I can’t think of the last time I felt the need to clamp a piece down. I really like the fact that the fence is short, yet can be slid side to side so you can use the stops on wide boards. The replaceable insert is pretty nice as well as it’s a 1/2″ thick and has leveling screws. The insert for my stock table was 1/8″ and had no leveling ability, thus it was pretty useless. Hopefully this table holds up to my sometimes heavy handed use, If it doesn’t I’ll be sure to write about it.
Before
After
Everyone knows that fine saw dust can be bad for your lungs, but last weekend I learned about another saw dust danger the hard way. My shop dust collection isn’t perfect, but it’s good enough for now. I usually have some dust laying on the top of the table saw, Thus last weekend I thought nothing of it when I went to use my cross cut sled. It wouldn’t drop into the miter slot, so I bent down and looked down the slot. when it dropped in, I got a shot of large MDF dust particles in my right eye.
I got most of it out with the eye wash kit in the bathroom, but one or two chunks would not come out. By the time I was able to get to the doctor the next morning, I had a severely scratched cornea. For 2 or 3 days I could barely open my eye, but thanks the ointment the doctor gave me, I have since fully healed. While I’m fine now, the doctor warned me that I could have easily permanently damaged my eye. Thus next time you’re in the shop, make sure you keep in mind some of the other dangers related to sawdust.