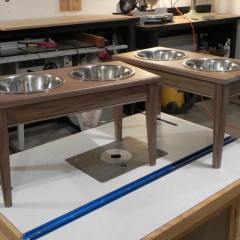
After a few shop projects, I can finally start my next “real” project. For several reason, some intensely personal, & others less so, this project is very important to me. This is the first piece, of “fine furniture” that is 100% my design. All my previous projects, have been a copy of, or my take on someone someone Else’s design. The Sketchup file linked below,shows what several might find excessive for something as mundane as raised dog dishes, but nevertheless it illustrates what I consider my evolving style.
Over the weekend I tried my hand at exporting an animation from Sketchup, and I must say it was a lot simpler than I though it would be. In less than an hour I went from knowing nothing about it’s animation capabilities, to producing the video shown below. For those that are interested in the animation functionality, I found this tutorial very informative.
Design details:
- Legs tapered on two sides
- Apron beading
- dovetail joinery
- buttons to attach the top
- made from solid walnut
The plan: raisedDogDishes.skp

The rouch cut Walnut.
Two days into the project, and I have already made significant progress. This project started the way most woodworking projects do; rough milling the lumber to size. Thursday night, after a nice dinner, I spend about an hour in the shop, cutting all the apron and leg pieces to size. This walnut was purchased from The Hardwood Connection. Since this is the first time I’ve used them I thought it would be prudent to let the wood rest, just in case it was dried to fast and had lots of internal tension. I let the boards rest for a little more than 48 hours.

Four-square & ready for joinery.
This morning I spent about three hours in the shop dimensioning the lumber from Thursday. I know three hours is a long time to dimension two dozen little boards, but in my defense, I was only working half the time. The other half of the time, I was sitting on the couch watching the woodworking shows I DVR’ed from earlier in the week. It never ceases to amaze me how much smaller the lumber pile looks after the boards have all been dimensioned.
Since I had nothing else to do today I spent a little time working on my neanderthal skills. I flattened the board below using only my Jack plane. As you can see, the Walnut looks really amazing. I can’t wait to see what it looks like with a coat or two of finish. I’m probably going to use Waterlox’s Marine finish, but I’m not 100% sure, I might just use polyurethane. Maybe I will flip a coin when it comes time to apply the finish. I might apply some amber shellac to this board just to see how it looks, as I’m considering walnut for some future projects that won’t require as much protection as these dishes will.

Flatened neanderthal style.
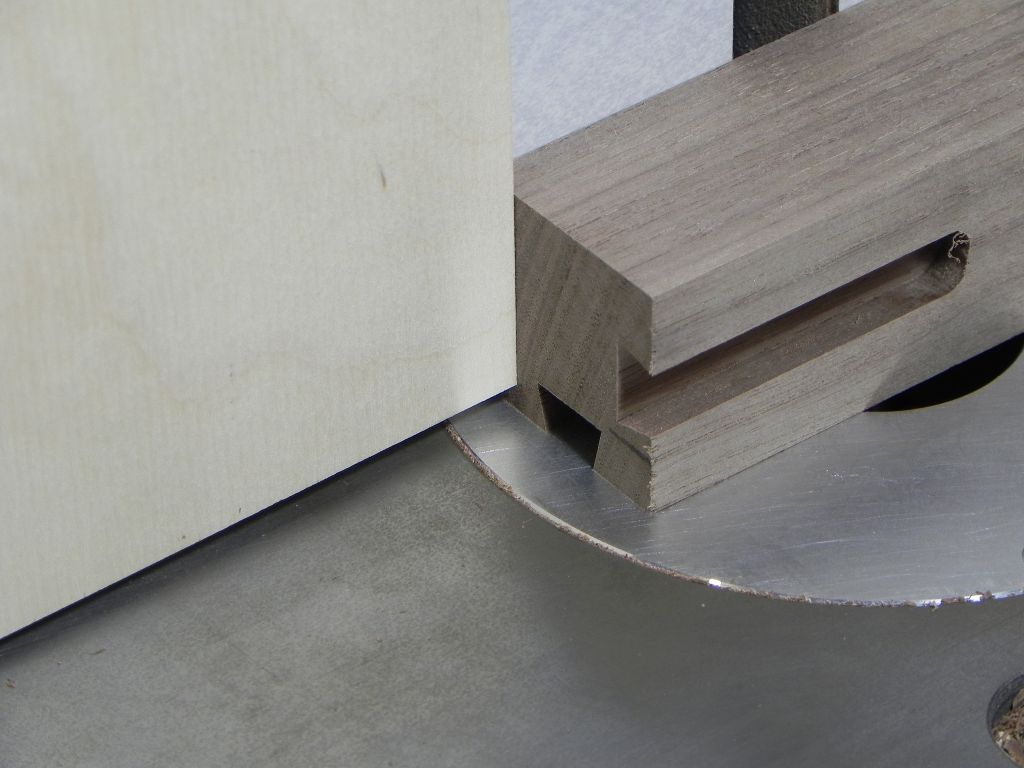
I got a lot more done on day three of this project, than I have in any previous project. I attribute the increased efficiency, to my new router table. Since the pieces for this project are small, it’s safer and faster to rout them on the table, than by hand. Day three started at the table, by making the stopped sliding dovetails in the legs. One thing worth noting, is that the dovetails, are 1/2″ wide, but I used a 3/8″ bit to make them. This requires 3 passes, One down the middle to remove the bulk of the material, and then one down each side, to bring the tail to the final width. It takes longer than using a bit of exact width needed, but in my opinion it produces a superior joint. Passes two and three, remove very little material, and are thus less likely to produce chatter, & inaccuracies.
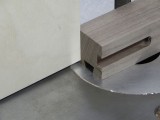
A raised stop block promotes accuracy, think about it.
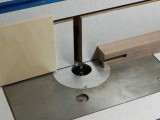
Loving the new inserts
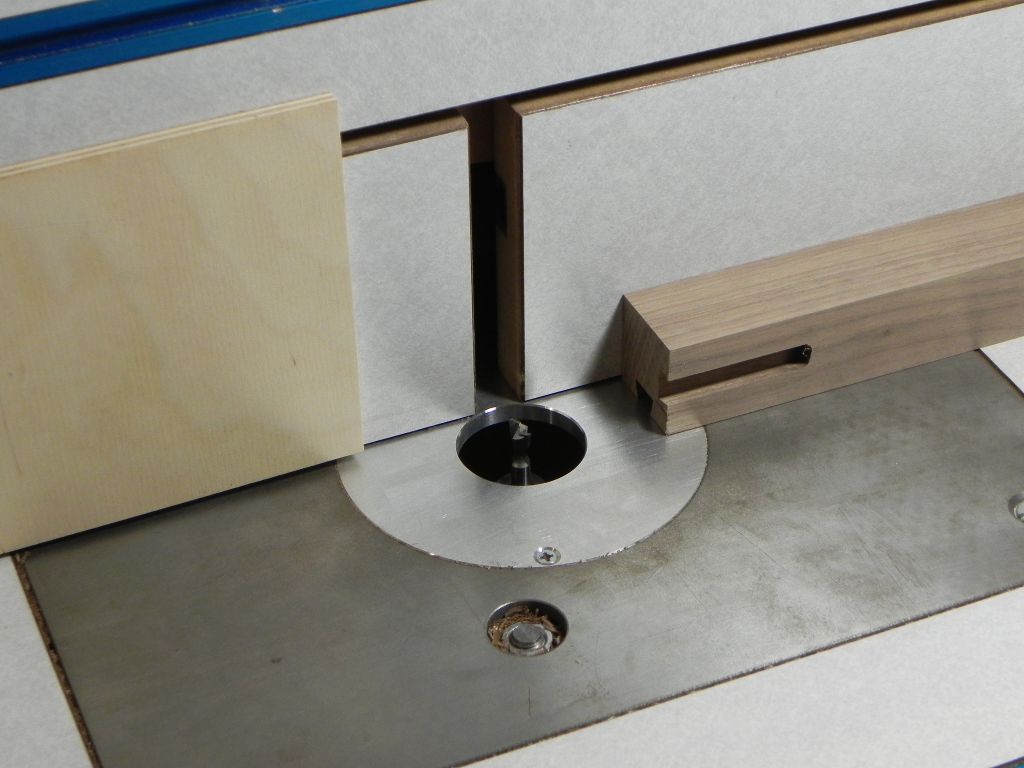
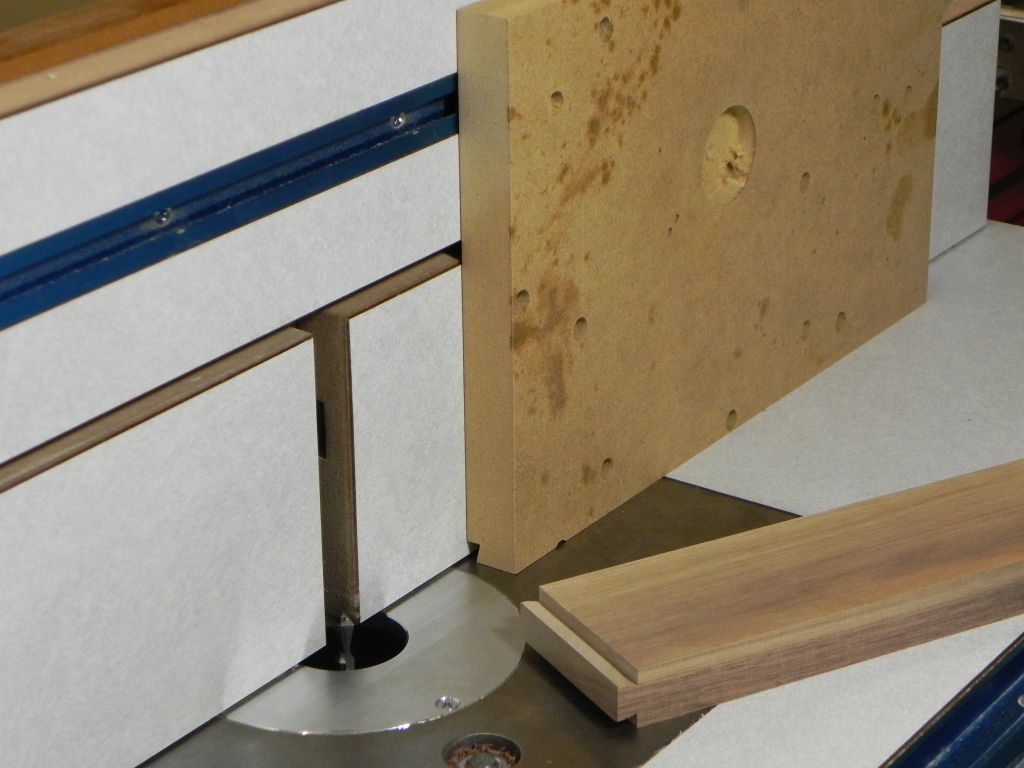
Next I cut the mating dovetails in the apron ends. Again, multiple passes are better than one. In this case I used two passes, One that just nicked the surface to prevented tear out, and one that brought the tail to final width. To support the boards while routing, I used my favorite jig. Ok, not really I bug through the scrap bin till I found a decent sized piece of MDF, and then I straitened & squared two of it’s edges.

Multiple passes prevent tear out

Scrap MDF makes a perfect jig for controll tall narow boards.
With the dovetails done, it was on to the table saw to cut the haunches. Yes I said haunches, square blocks don’t fit in round holes. The bottom of the leg tails are round (a side effect of using a router), and the apron tails are square so something has to give. Now I could round over the apron tails with a file, or square the leg tails with a chisel, but that’s to much like work. After they’re glued up no one will know what method I chose anyway. As you can see in the following photos, I morphed into David Marks, and used my cross cut sled just because I could. Continue Reading…
Day for went a little slower than day 3, but I still made A great deal of progress. I started off by finishing the apron pieces, all I had left to do was rout the button grove. The groves are 5/16″ of an inch deep by 1/4″ wide. That’s to much material to remove in one pass, so I took 5 1/16″ deep passes. The groves came out Ok, but if I feed to fast, they router bit complained.

The button grove
What really consumed a lot of time was the next step, tapering the legs. This is the first project I’ve incorporated tapers into. It took a lot longer than I though it would, to get the jig set up correctly. Eventually, I got everything dialed in and was able to batch out the legs fairly quickly. One thing I need to remember for next time, is to not use an 80 tooth cross cutting blade. While it left an excellent finish, my little contractor saw was working really hard to make the cut.

Tapering the legs on my new tapering jig.
Continue Reading…
After Today, I think I’m going to avoid the shop for a few days. I have some bad mojo hanging over my head, because last night I did something I almost never do. I broke the cardinal rule of woodworking; measure twice, cut once. When I purchased the wood for this project, I picked up a beautiful 12″ wide board so I could make the top out of one piece. Last night, everything started out smoothly. I ripped the board to length, flattened it, and jointed an edge in short order. When it came time to rip it to width, I wasn’t paying attention, and read the fractional part of the measurement of the length line on my scratch pad. Thus I ripped it to 10-1/8″, instead of 10-11/16″.
Thankfully I had enough extra stock that I could fix the problem. Thus after much cursing & pouting, I fixed my blunder. I ripped the top into 2 narrow piece, and then added a 3rd board milled from the extra stock. While it doesn’t look that bad, it’s not as nice as it could have been.
Remember: measure twice, cut once.