I’m behind on getting updates on this project published, the following photos are from last weekend. While I didn’t get much accomplished, it’s starting to look like a router table. The two main things I got done where mounting the drawers, & sizing of the on of switch mount. I did one thing I won’t soon forget, chopping a mortise in plywood, murders a chisels cutting edge.
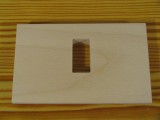
The switch mounting Mortise.
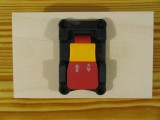
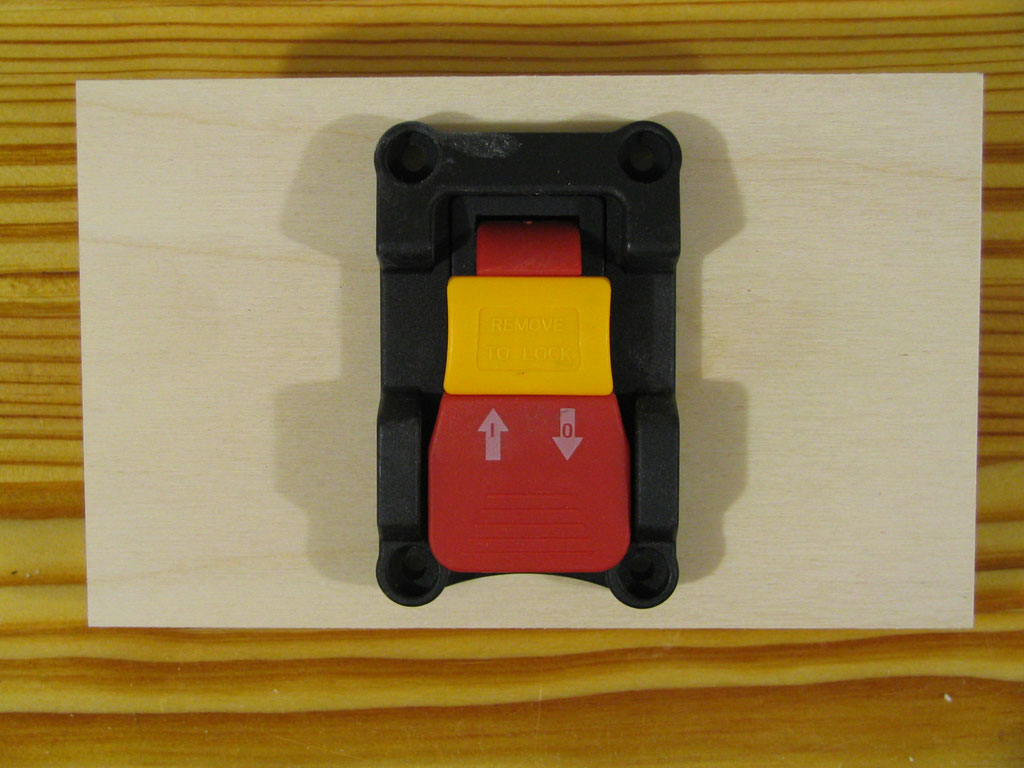
The switch mounted in the mortise.
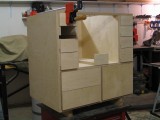
The case is all but finished.
Who says you can’t find great deals on eBay anymore!! This lovely marking knife only cost me $29 delivered to my door step. It’s 7″ long by 1/2″ in diameter at the finger grip, and made from genuine Middle-Eastern olive wood. The blade is made of O-1 tool steel that has been hardened, tempered, and then sharpened to a 55 degree included angle with 20 degree bevels. After 15 minutes of honing on my water stones, the blade was sharp enough to shave with. This knife will probably last me a life time, but at some point in the future I want to try my hand at making one.

The cap makes it safe for breast pocket storage.

If you ignore the dust, you can see the lovely almost burl like grain patern on the handle.

Though the image doesn't do it justice, the blade is razer sharp, highly polished.

The cap
Friday, I finished up the three bottom storage drawers. The drawer joinery, is another one of details that my design deviates significantly from Norms. For utility drawers like these, that aren’t going to see a lot of daily use I like to use dado & rabbet joints. They’re easy to make on the table saw, & provide a strong mechanical connection.
The following rendering shows a drawer constructed using this joinery method. The drawer sides have a dado cut into both ends, while the front & back have rabbets cut on their ends that fit into the side panel dados. The false front is glued onto the inner front panel.

Rendering of a drawer with a false front, that's held together with dado & rabbet joints.
The following shots show the steps I use to make drawers using dado & rabbet joinery. For reference, the drawer sides are 1/2″ ply, the bottom is 1/4″ ply, and the false front is 3/4″ ply. Before you start, one thing I recommend, is to place indicator marks on key faces. It’s really easy to get a board turned around and cut a rabbet or dado on the wrong side when your running a batch of boards. Indicator marks help prevent this, assuming you remember to pay attention. Trust me, I’ve learned this the hard way many times over.
Continue Reading…
I started assembling the carcase last Wednesday, and finished up this weekend. At first I thought I would have it done in a day, but I always seem to underestimate how much time waiting for glue to dry consumes. It was worth it though, because if I knock on any of the panels I get a nice hollow ringing sound (signifies sound joints). I must admit, that at first I was a worried about the carcase assembly, because I don’t have a lot of casework under my belt. In the end, it was very strait forward an uneventful, because I took the time to do two separate dry fits.

Assembled Carcase
Sunday on the other hand was far from enjoyable. I learned two things Sunday afternoon that I won’t soon forget. One, no retail store (around me) carries drill bits sized in 32nds above 1/2″. I was to lowes, Menards, Home Depot, Farm & Fleet, Ace, True Value, even my local Rockler store, and none of them carry 17/32″ bits, let alone a brad point. Two, who ever decided router bit shancks should be 1/4″ & 1/2″ in diameter should be slapped across the back of the head. Imo they should have been 15/64″ & 31/64″, that way You could use 1/4″ & 1/2″ drill bits to make holes to hold them.
On Friday, the plywood I ordered finally arrived, so construction has commenced. As I mentioned in an earlier post, the main differences between my table and Norm’s are the joints. He’s well known for his use of screws & biscuits. For example he used biscuits to join the case back to the sides and internal dividers, and well I find this method substandard. I chose to use dados, but as you can see below this leads to a scenario where 3 stopped dados intersect with a 4th dado.

Normally stopped dados have to be cleaned up with a chisel, but since these intersect with another dado, a router equipped with a special template bit can do the clean up faster than anyone could do by hand. Check out the following photos you’ll see what I mean.
Continue Reading…