After probably 35 or 40 hours of work, the scrap wood side table is finally done, and Most importantly Jillian is very happy with it. Since I still have yet more presents to make, this post is going to be pretty short, but hopefully the photos make up for the lack of words.
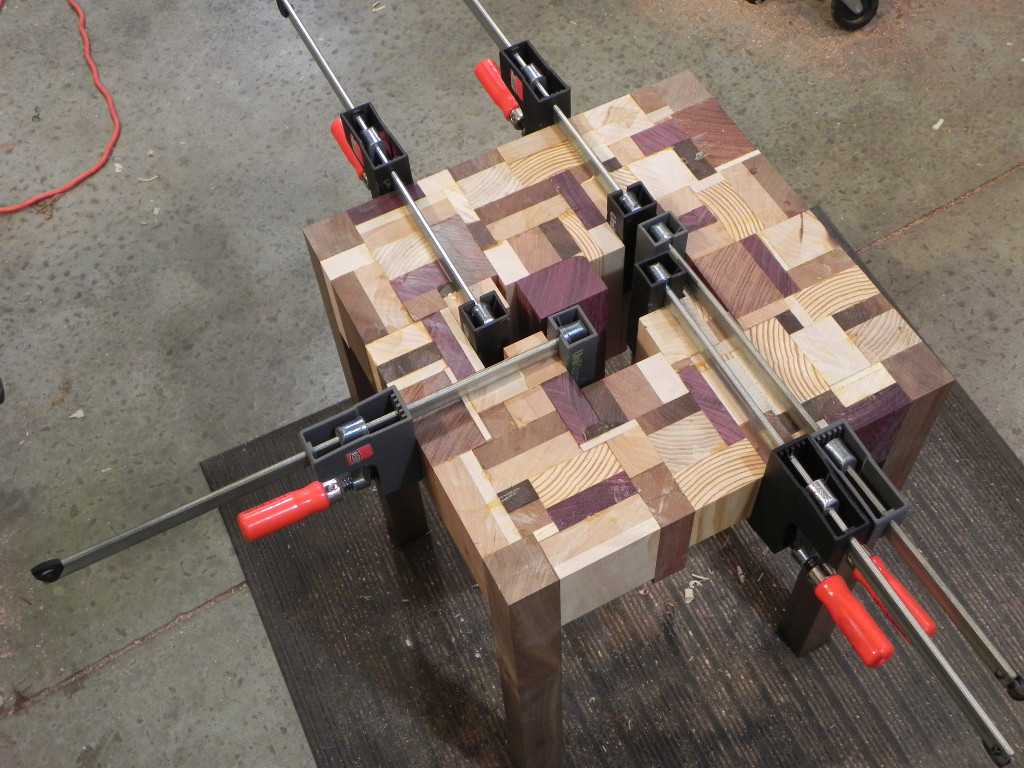
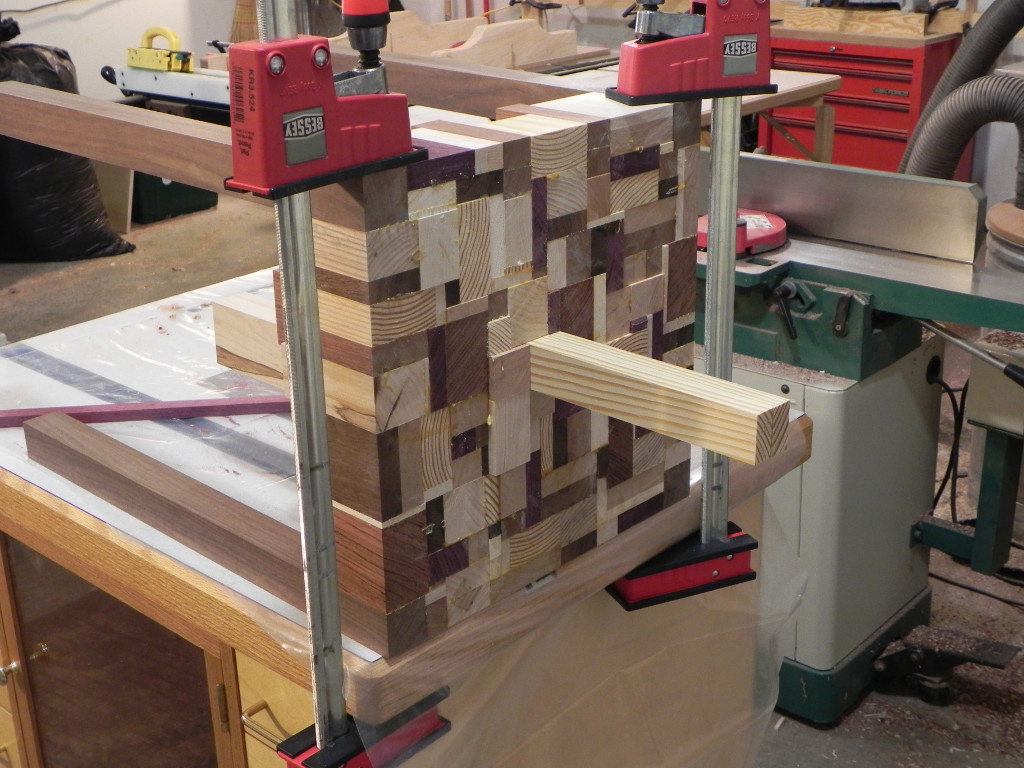
The two photos below, show what the top looked like over the last two days of assembly. Counter to what I thought would happen, the pace of construction actually slowed the closer i got to being done. The main reason for the slow down, was because the clamps that held the last piece in place, prevented me from either fitting or gluing up the next piece, so I lost a lot of time waiting for glue to dry. The last dozen or so pieces had to be tapered by hand, because of the cumulative error of all the individual glue-ups. The last 2 or 3 pieces where so tight I had to drive them in with a mallet, and hope a joint didn’t blow out.
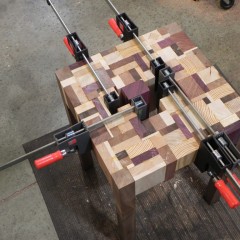
almost done
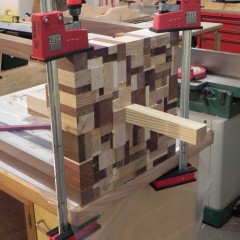
The last piece
Continue Reading…
It’s been over a month since I started this project, and I have to say it’s taken a lot longer than I thought it would. Milling up all the lumber took the better part of a week. Gluing the sides together took two days, mainly because I had to do several little glue ups to make the initial side pieces. To date, this project has been a never ending marathon of gluing a block in place, and either sizing the next block or making a new sub glue up. It makes it really hard to get into a rhythm, because I have to constantly stop and wait for glue to dry.
I spent the better part of 8 hours today in the shop working on it, so rather than babbling on, I’ll just share some photos of my progress.

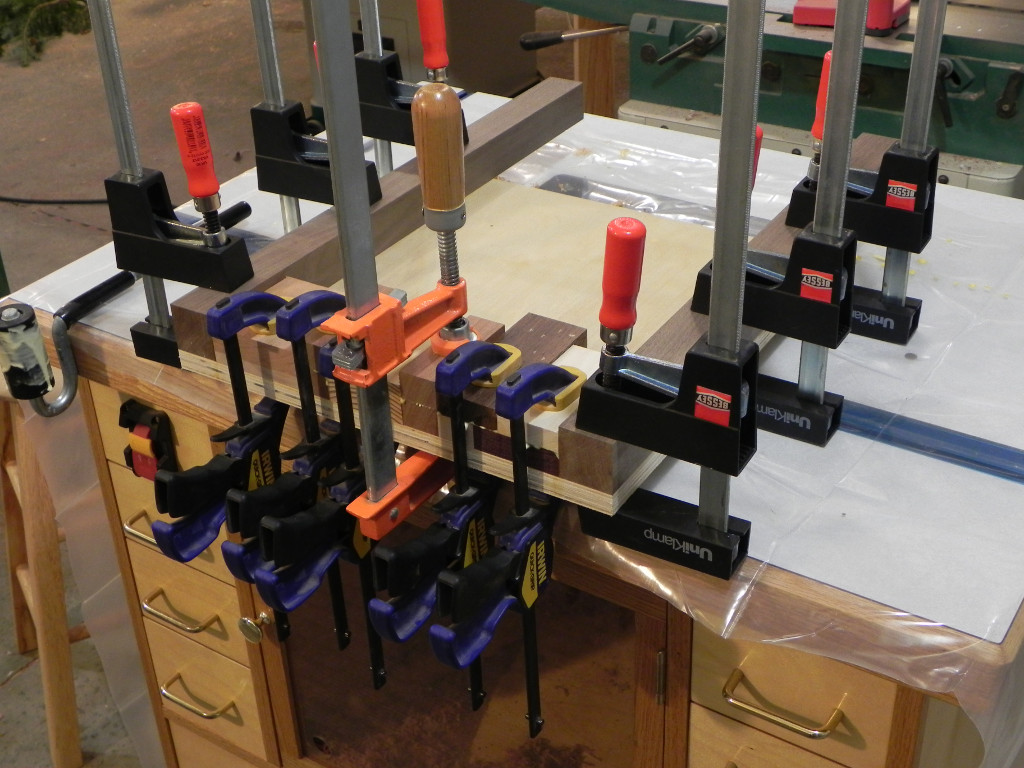
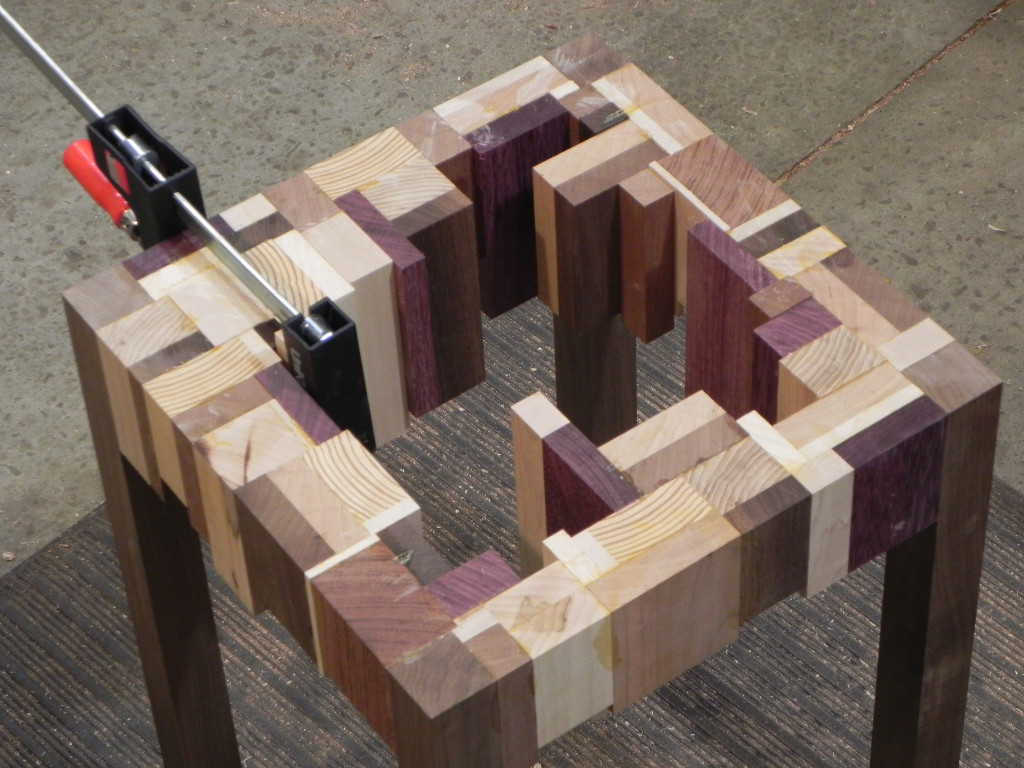
I used a waxed plywood jig to glue-up and size the sides.
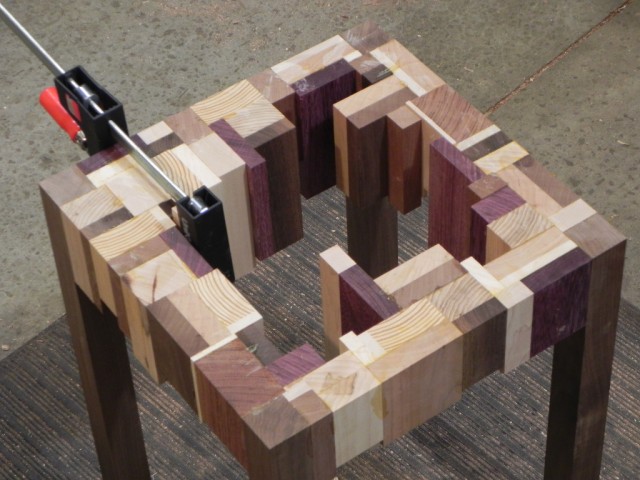
All four sides are done, and I’ve started to fill in the middle.
A Recent forum post I read got me thinking about about the myriad of tools used for measuring and layout. It’s truly amazing how many different types of tools people use, and the reasons they use them. Thus in the spirit of the forum post, I’m going to show the tools I use, and explain why I prefer them to other options.
Marking Tools
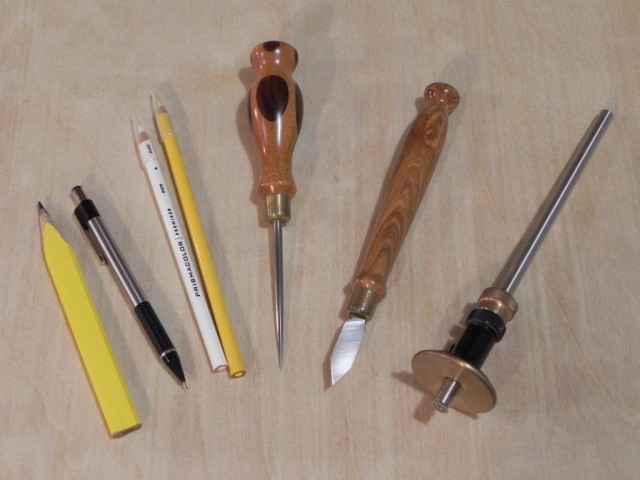
I have a range of marking tools in my shop as seen below. Four laying out cut lines on rough boards before breaking them down I use a run of the mill carpenters pencil. It’s easy to sharpen, makes nice thick highly visible lines, and it holds up well to the abuse associated with the work it’s used for. For layout work post the initial milling, I use a 0.5mm mechanical pencil. The fine mark it leaves is great for accurately laying out final dimensioning cuts.
Unlike the carpenters pencil, it’s fragile, and thus it requires a little more care while using. For example, its very easy to break the lead while marking on large pore woods, if to much pressure is applied. For dark color woods where the mark left by a regular pencil is hard to see I use colored pencils. I want to be clear that these aren’t children’s colored pencils, but artists ones that cost two or three dollars each. They dull quickly because they are soft, but if you keep them sharp, they provide highly visible lines.
For hand tool work I use traditional marking tools. For marking with the grain I use a scratch awl. Though the one I have works, I’d prefer one with a grip more like that of a pencil as well as a shorter shaft, because I feel those to features would offer more control. For general cross grain work I use a spear point marking knife that I picked up on eBay. For cross grain work Like marking out dovetail baselines, I currently use a Veritas wheel marking gauge. The wheel gauge is a good tool, but I prefer a more traditional knife tip blade for harder woods. The knife tip blade seems to severe the wood fibers more easily than a wheel.
Continue Reading…
A few weeks back, a video circulated on Facebook of a woodworker building a little table made from wood in his scrap bin. Someone very special to me loved thy way it looked, and asked that I make one for her. After some googling, I was able to find the the video below, and the associated blog post.
The table I’m going to build will be similar in design and construction, but a little smaller do to the physical constraints of it’s future home. My goal is to make a pattern as random as the original, but without the gaps that Mike had an issue with. While I’m confident it can be done, I know it’s going to be a very time consuming task, as It’s essentially building an end grain cutting board one block at a time. It’s also going to be a real challenge for me, as I have a very organized/structured thought process, and thus creating a random pattern like this is dificult.
I will need to purchase some wood though, as my current collection of scraps isn’t very colorful, and I don’t have any boards big enough to make the legs. I’m going to use black Walnut for the legs, but I haven’t decided if I want to use Cedar, or Jatoba to add some red to my color palette. I’ve pulled the following species form my scrap bin Hard Maple, Purpleheart, Sapele, Peruvian Walnut, Ash, Aspen, Sycamore, Panga Panga, & Sothern Yellow Pine.
The simple Ribbon Stripe Sapele side table is finished and ready for delivery. As is the case with a lot of my projects, I was behind schedule when it came time to finish the piece. Thus, I didn’t get a lot of intermediate step photos of finishing the process. However, that won’t stop me from sharing what I currently consider my go-to finish.
To pop the grain and add a little color to the Sapele, I decided a coat of boiled linseed oil was needed. Common etiquette says you should flood boiled linseed oil onto the wood and let it soak in and then whip off the excess after a few minutes. I’ve found this method to be more trouble than it’s worth, because it usually leads to boiled linseed oil weeping out of the pores as it cures. depending on the wood species, the weeping can go on for almost a week, and thus really prolongs the finishing process. Continue Reading…