Finishing Ribbon Stripe Sapele
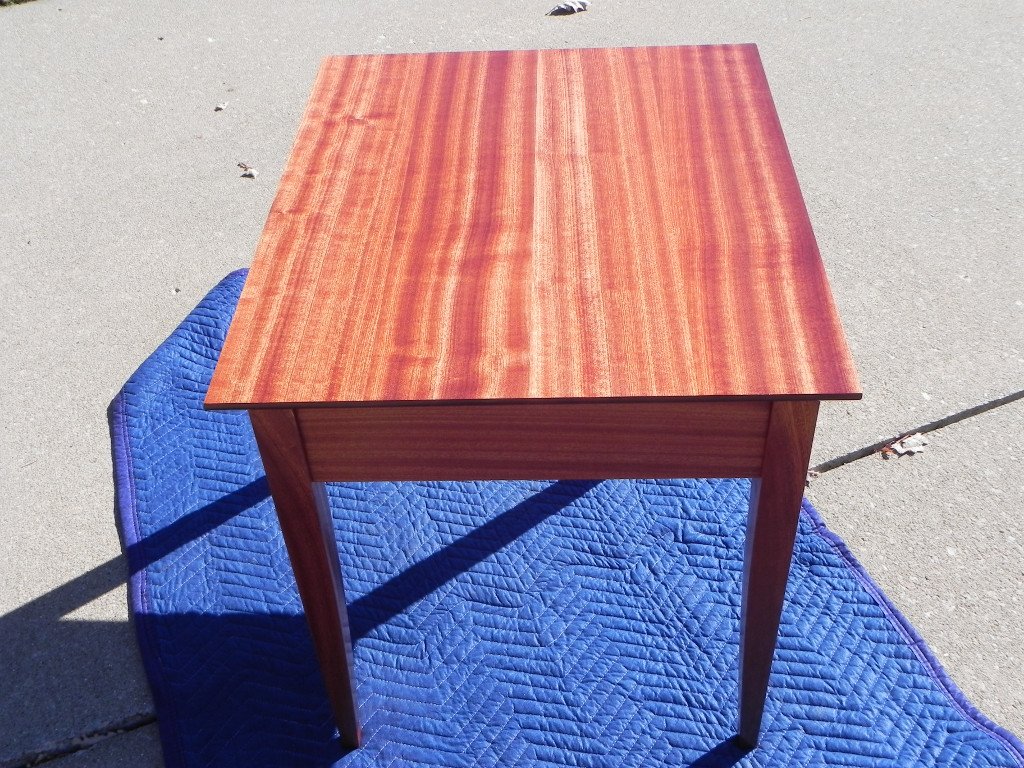
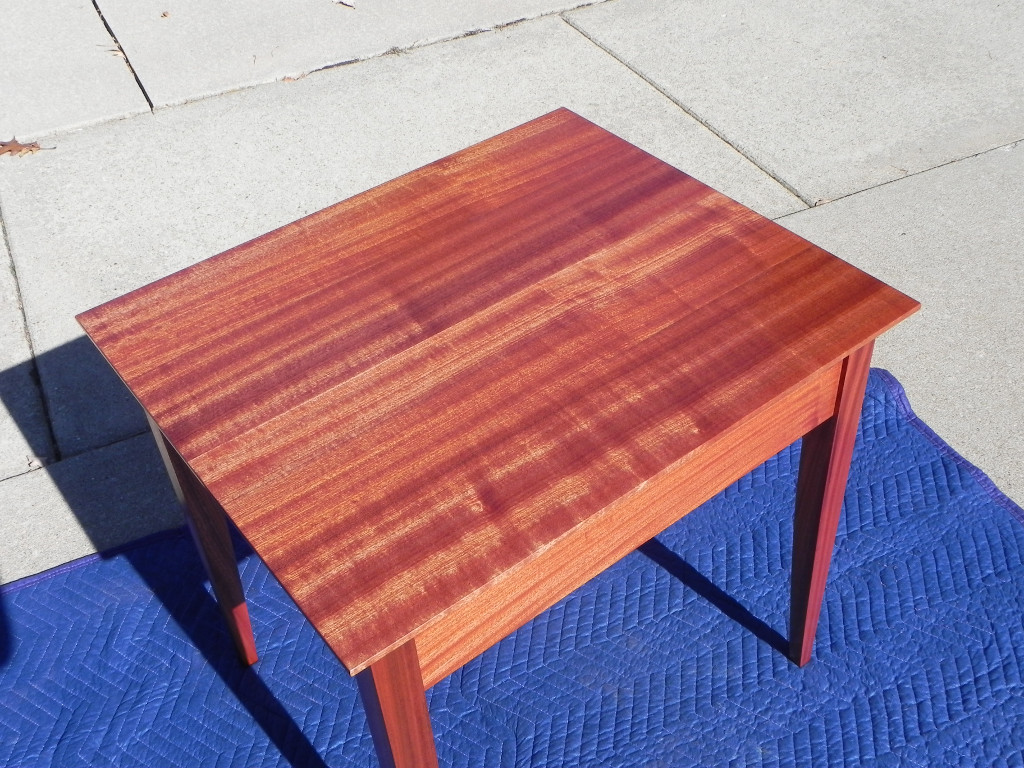
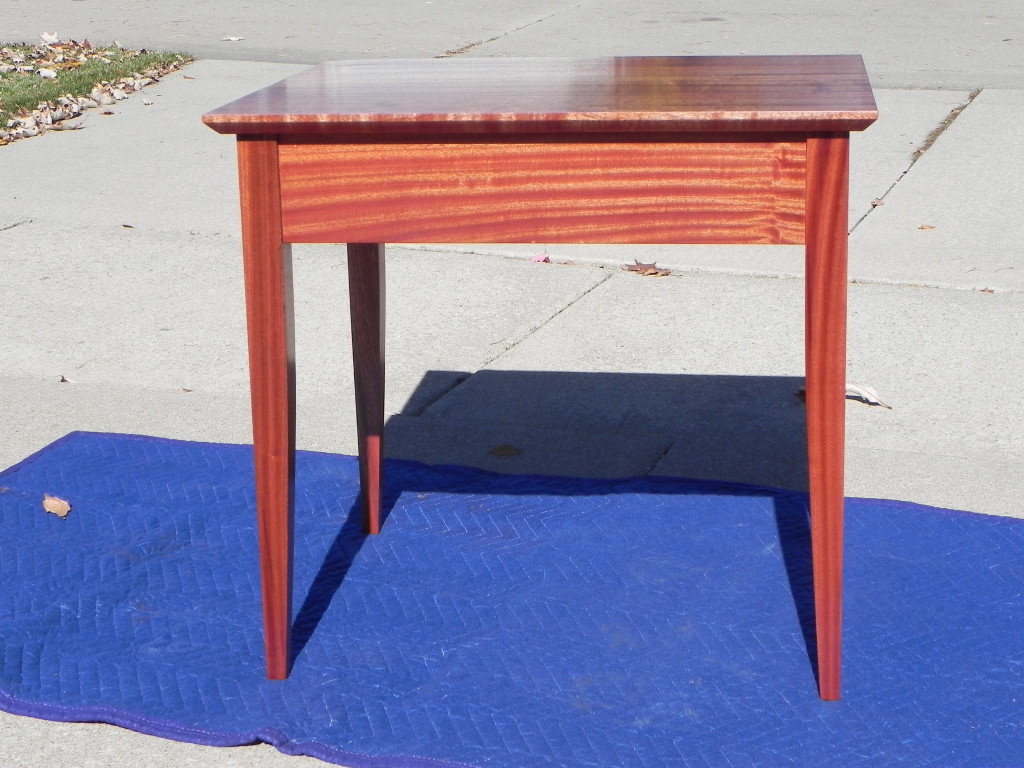
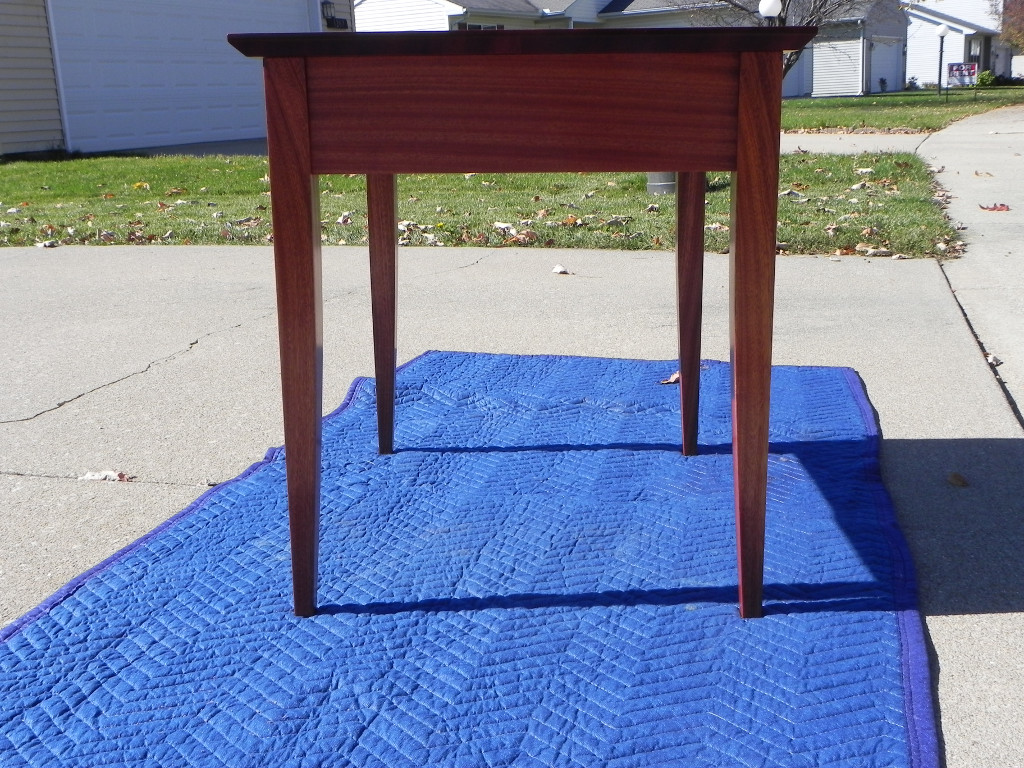
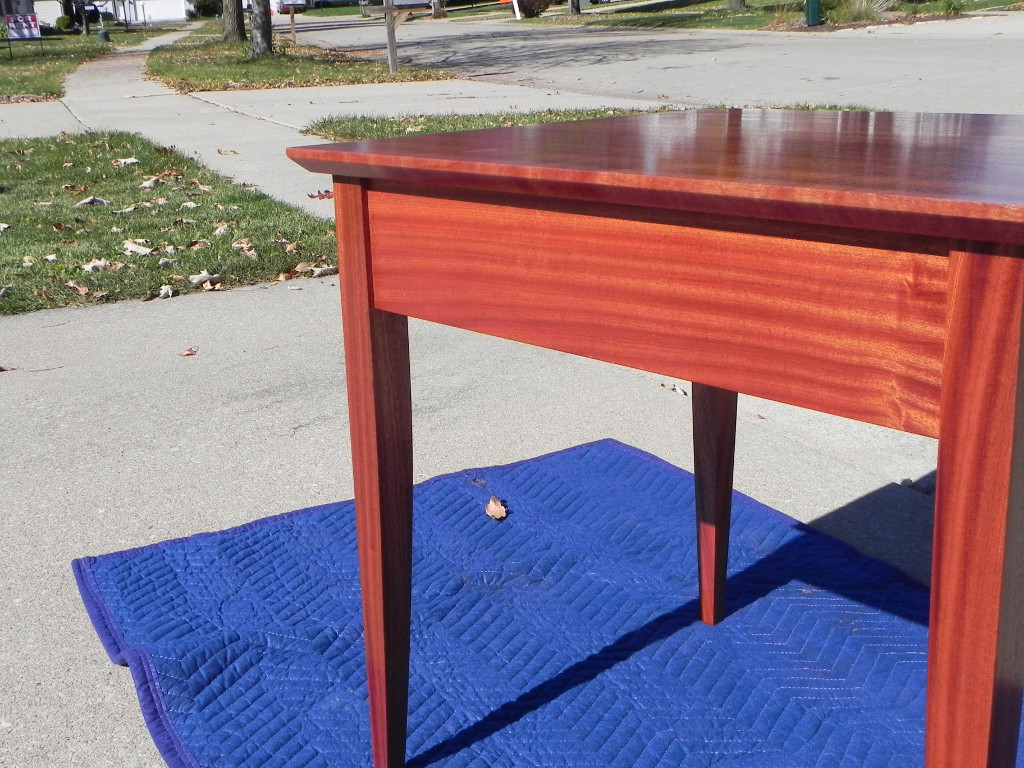
The simple Ribbon Stripe Sapele side table is finished and ready for delivery. As is the case with a lot of my projects, I was behind schedule when it came time to finish the piece. Thus, I didn’t get a lot of intermediate step photos of finishing the process. However, that won’t stop me from sharing what I currently consider my go-to finish.
To pop the grain and add a little color to the Sapele, I decided a coat of boiled linseed oil was needed. Common etiquette says you should flood boiled linseed oil onto the wood and let it soak in and then whip off the excess after a few minutes. I’ve found this method to be more trouble than it’s worth, because it usually leads to boiled linseed oil weeping out of the pores as it cures. depending on the wood species, the weeping can go on for almost a week, and thus really prolongs the finishing process.
I’ve gotten good results and drastically decreased the curing time buy applying a single light coat. for an applicator, I make a pad out of a simple shop paper towel. I prefer the non-quilted ones as they seem to fuzz up less, and leave fewer streaks. I charge the pad by dunking it in the oil, and then thoroughly wringing it out. It needs to be wet, but not sopping. To apply the oil, I use small circular motions just like I would use to work wax into the grain. This method takes a little longer to apply the oil, but it’s usually dry and ready for a top coat in under 24 hours.
For the top coat, I chose to use my home brew wiping varnish. It’s made by taking gloss Pratt & Lambert 38 and thinning it by 50% with mineral spirits. In my opinion, P&L 38 is the best varnish I’ve used to date. It’s made with and Alkyd and Soya oil, so it barely changes the color of the wood initially and yellows the least of all the varnishes types over time. The only thing bad about it, is it’s hard to find. The only place I can find it in central IL, is my local Do it Best hardware store.
To apply it, I use a paper towel pad, to wipe on light coats. wherever possible, I wipe with the grain using what I call the airplane landing technique. Basically you start above, and off then end of the work piece, and as you pass over the edge of the piece, you lower your pad till it touches the wood, like an airplane landing. When you reach the other end you wipe off the end without lifting. This method helps prevent stop/start marks. Depending on the amount of protection needed, I apply between 4 and 10 coats. For this the table, the legs and aprons got 4 coats, and the top got 7.
I’m still undecided on how often I should sand between coats. Some times I sand between each coat, some times it’s every 2, 3, or even 4 coats. It comes down to how clean my shop is, and what the shop climate is like at the time I apply the finish. If my shop is super clean and dry, I can go 3 or 4 coats because the finish dries fast and dust nibs don’t have time to form. In the winter when it’s cold in my shop (no permanent heat ), I seem to sand between ever coat. For sanding between coats, I use 1500 grit Mirka Mirlon, as I’ve found it’s all that’s needed to remove dust nibs. Since it’s such a fine grit, it doesn’t remove much finish, and because it’s a mesh, it last a long time. I would go as far as saying it never really clogs like fine sandpaper does, instead the abrasive just wears out.
I personally don’t like the feel of an off the brush/rag finish, as it feels to much like a really clean Tupperware container. Thus I Always “finish the finish” as Bob Flexner would say. After I apply the last top coat, I let it cure for a few days, and then lightly sand it with Mirlon again. One I have sanded the entire piece to a uniform sheen, I apply a coat of wax. I almost always use clear Liberon Black Bison wax, as it’s a very high quallity wax and doesn’t alter the color of the piece at all.
I probably spend more time finishing than most woodworkers, but in my opinion the results shown below are more than worth it.


BEAUTIFUL. I USED SAPELE THE FIRST TIME THIS YEAR. I DO LIKE YOUR TECHNIQUE AND OF COURSE THE RESULTS BEAUTIFUL.
DOC
I am about to apply a finish to a dining table project, and a major concern is water staining/spots. How does varnish stand up to long term home use? Thx
Most modern varnishes should do fine for a table top. How well they do depends on how much abuse the table top will take. If it’s getting pounded on, scratched, and scuffed by small children regularly you might want to go with something more robust like an epoxy finish.