It’s still unbearably cold in the shop, but last night I was able to finish up a project I have been wanting to do for a month. Back when I got my Veritas saws, it became evident after about 5 minutes, that I needed some type of bench hook for sawing. A while back Popular Woodworking, published plans for a simple bench hook, and it was exactly what I was looking for.
So after about 2 hours of shop time, I had 2 bench hooks for sawing. One if for perpendicular cross cuts, and the other is for 45’s. I made them out of poplar, because its cheap, and easy on the saw blades.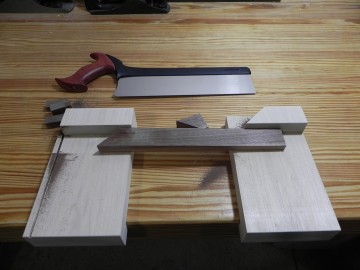
 I haven’t gotten much done in the shop recently, because it’s been unseasonably cold the last week. Even though it was uncomfortable in the shop, I was able to make a bench appliance I’ve been putting off for months. I’ve been using my hand planes with greater frequency lately, and since I don’t have a proper woodworking bench, It’s a real pain to secure lumber for planing. Thus I made what I’m going to call a planing stop bench hook. The only thing exciting about it, is that I used pegs to attach the hook the the base. It roughly 10″ wide by 20″ long and made from 3/4″ MDF, scrap red oak, and 3/8″ Birch dowel.
I love the look of the pegs
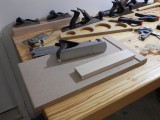
Ready to rock and roll
My first handsaw was a cheap Buck Brothers saw that I got at the local True Value. It wasn’t very sharp, and its fit & finish wasn’t very stellar either. With that being said, it got the job done all kinds of projects. I used it for everything, cutting scarp to size when i didn’t want to move the cars to get to the miter saw, to trimming the bottom of a Christmas tree (the neanderthal police are still after me).
My parents got me the new Veritas carcass saws for my birthday, and they are leaps and bounds better than the old Buck Brothers. The bubinga handles have an excellent finish, and the blades are highly polished. In my opinion, the best feature of these saw, is newbie proof labels. After all, not everyone, can just look at a saws teeth, and tell what type of saw it is.
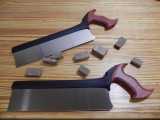
Sweet......
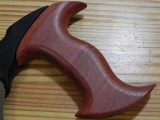
Check out the bubinga
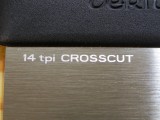
Newbie proof labeling
John Economaki over at Bridge City Tool Works recently published a blog post titled $5 for a 1/8? Twist Drill? Only in America… (it’s a great read). I won’t spoil it for you, but during his tour of a Chinese factory a worker tells John “In America, if it cost less than $20, nobody complains about quality—everybody in China knows this”.
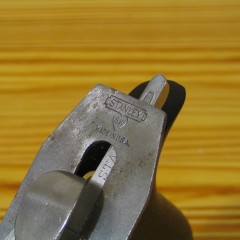
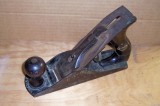
Today I Purchased a new smoother from eBay. It’s a Stanley #4 type 14 that I picked up for $19.99. It only has two things wrong with it that I can see; The lever cap is not original, and the tote is broken (easily fixable). Even if it shows up with a defect that makes in unusable, I can still sell the parts on eBay and make more than I paid for it. Thus, I can promise this is one purchase I won’t be complaining about.
I got a lot more done on day three of this project, than I have in any previous project. I attribute the increased efficiency, to my new router table. Since the pieces for this project are small, it’s safer and faster to rout them on the table, than by hand. Day three started at the table, by making the stopped sliding dovetails in the legs. One thing worth noting, is that the dovetails, are 1/2″ wide, but I used a 3/8″ bit to make them. This requires 3 passes, One down the middle to remove the bulk of the material, and then one down each side, to bring the tail to the final width. It takes longer than using a bit of exact width needed, but in my opinion it produces a superior joint. Passes two and three, remove very little material, and are thus less likely to produce chatter, & inaccuracies.
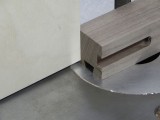
A raised stop block promotes accuracy, think about it.
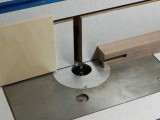
Loving the new inserts
Next I cut the mating dovetails in the apron ends. Again, multiple passes are better than one. In this case I used two passes, One that just nicked the surface to prevented tear out, and one that brought the tail to final width. To support the boards while routing, I used my favorite jig. Ok, not really I bug through the scrap bin till I found a decent sized piece of MDF, and then I straitened & squared two of it’s edges.
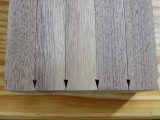
Multiple passes prevent tear out
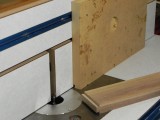
Scrap MDF makes a perfect jig for controll tall narow boards.
With the dovetails done, it was on to the table saw to cut the haunches. Yes I said haunches, square blocks don’t fit in round holes. The bottom of the leg tails are round (a side effect of using a router), and the apron tails are square so something has to give. Now I could round over the apron tails with a file, or square the leg tails with a chisel, but that’s to much like work. After they’re glued up no one will know what method I chose anyway. As you can see in the following photos, I morphed into David Marks, and used my cross cut sled just because I could. Continue Reading…


