This is my 4th cutting board, and I knocked it out in 5 days, 7 if you count the 2 days I let the wood rest. This was a quick project by my standards, but it’s possible to finish even faster. The most time consuming part of making an end grain cutting board is the final flattening. Since it’s end grain, you Cannot (I can’t stress this enough) run it through a typical planer. Thus it pays dividends to make sure the final glue up is as perfect as possible.
In my opinion, there are two ways to safely flatten the board. The first is with a drum sander, and the second is with a router sled. The drum sander yields a finished board right off the machine, but it can’t take off much material per pass. Additionally it’s not a tool found in most home shops, but if you have one it’s the best option. A router sled can remove more material per pass, but it yields a finish that requires additional refinement with abrasives. It also make a huge mess, unless you have some extreme dust collection in your shop.
Links of interest:
- Marc Spagnuolo’s podcast about making an end grain cutting board.
- CBdesigner is a free (love that word) program I use to design boards.
Examples from the video (CBdesigner files):
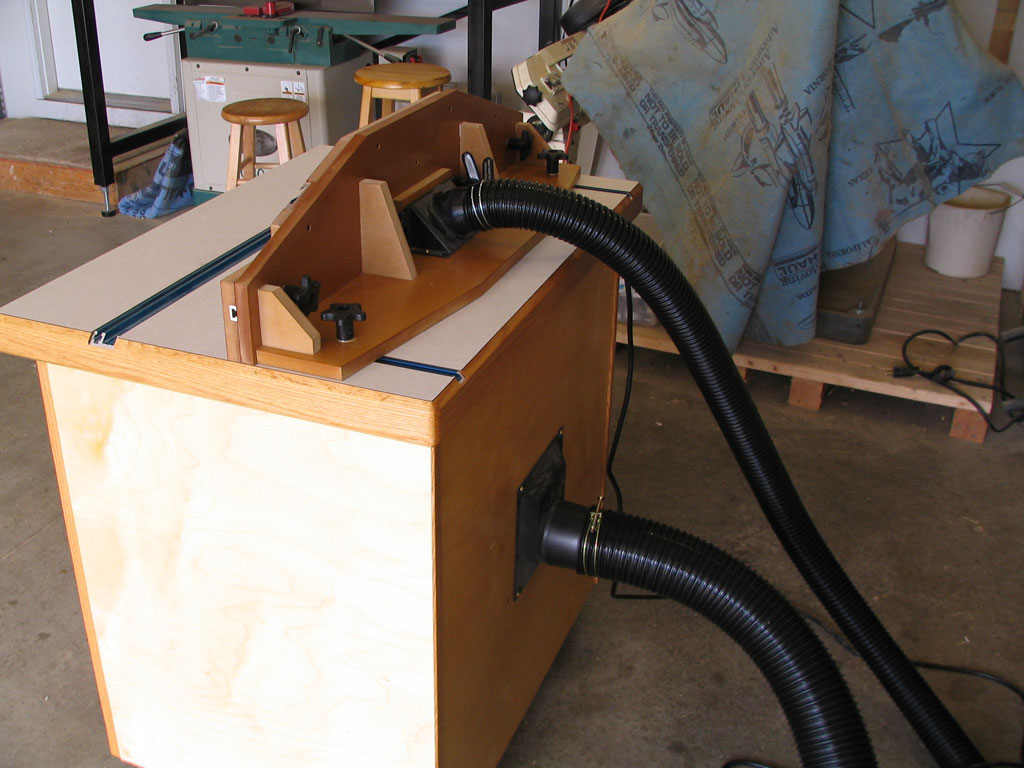
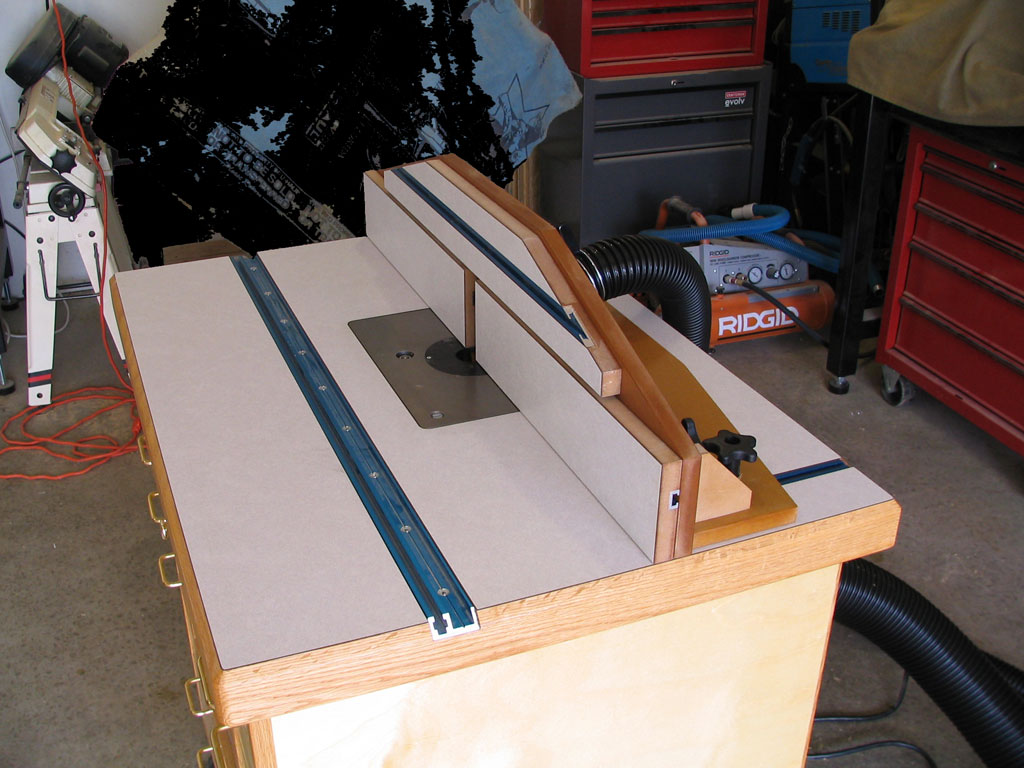
For the first time in a long time, I actually have a post ready to go when I thought I would. It’s been a long week, between finishing the assembly of my desktop & recording and editing video, but that’s all done with now, and my first video post is ready to go. I had originally planed on starting a cutting board project, but since it was so hot last weekend, I thought an obligatory shop tour would be a better idea. I know I have lots of room for improvement, but I’m pretty happy with my first attempt.
It’s been a few weeks since my last post, so it’s about time for an update. It’s been too hot (heat index approaching 110) the last several weeks to do anything meaningful in the shop, so I’ve been working on some new features for the site. Two new simple features are the links & contact pages. The final new feature is a custom flash video player, that I wrote and can be see in action on this old post. The player is nothing great, but it’s significantly cleaner than the free one I used previously.
Ok, now for the preview part.
I recently purchased a new Nikon P100 camera, to replace my ancient Cannon S1. Since the new camera takes both 720P & 1080P video, I’ve decided to start incorporating video posts into my blog. I’m psyched about this because I really enjoy posting about the trials & tribulations of my various projects, and then hearing back from people about how my post helped them with one of their projects. Additionally video opens a whole new realm of possibilities when it come to explaining something, because some things just can’t be adequately expressed with words & pictures alone. Now for the catch, my desktop died last week, and my laptop isn’t up to the task of processing video. I have parts for a new machine on order from Newegg, but it will probably be another week until I can get it built. So check back in a week or so and I should have my first video post up.
I’m in between big projects, so I’ve been keeping my self busy with little shop maintenance projects. Monday night I cleaned every saw blade I owned. While waiting for a particularly nasty blade to loosen up, I looked over at my saw and realized that I really didn’t like my push stick; so I decided to make a new one. After a little tinkering in Sketchup & an evening in the shop I came up with what you see below. It’s made from 3/4″ Baltic birch, and is roughly 15″ long by 8″ tall . I’ve played with it a little bit and I like it a lot better than my old one. The long base creates a large gripping surface, which does an excellent job of keeping the stock tight to the fence.

It’s finally done…
When I first started this project, I thought I would be done in a month. Now 6 months later, I don’t know where all the time went. I lost a week to a neck injury, but other than that I’ve worked on this project 10 to 15 hours every week. Either I work a lot slower than I think I do, or Norm has some magic tool to warp time.
All kidding aside, I’m really pleased with the results. I’ve gained additional storage space (always a plus in a small shop), and a valuable tool that I’m sure will be make many of my future projects much easier and pleasurable. And now it’s time for the obligatory final photos.