Making a surface plate cover
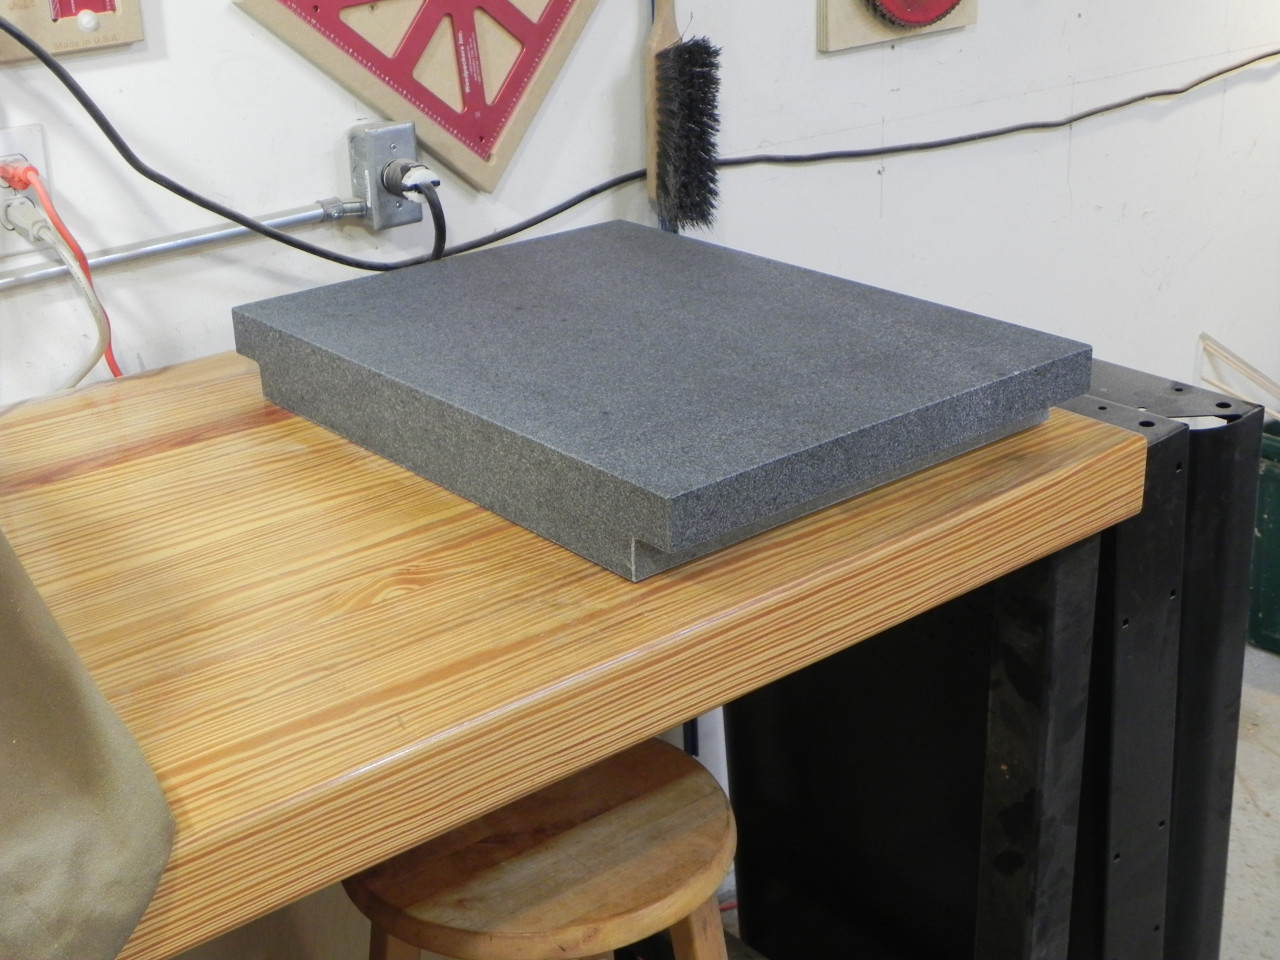
I purchased a 18″ x 24″ surface plate before Christmas, to replace the little 12″ x 18″ one a friend gave me several years back. It’s a Grizzly so it wasn’t super expensive, but I still want to protect it from the hazards in my shop. It’s been sitting on the bench covered with the ugly and flimsy shipping crate it came in. Last week, I finally got around to making a much strong and prettier cover for it.
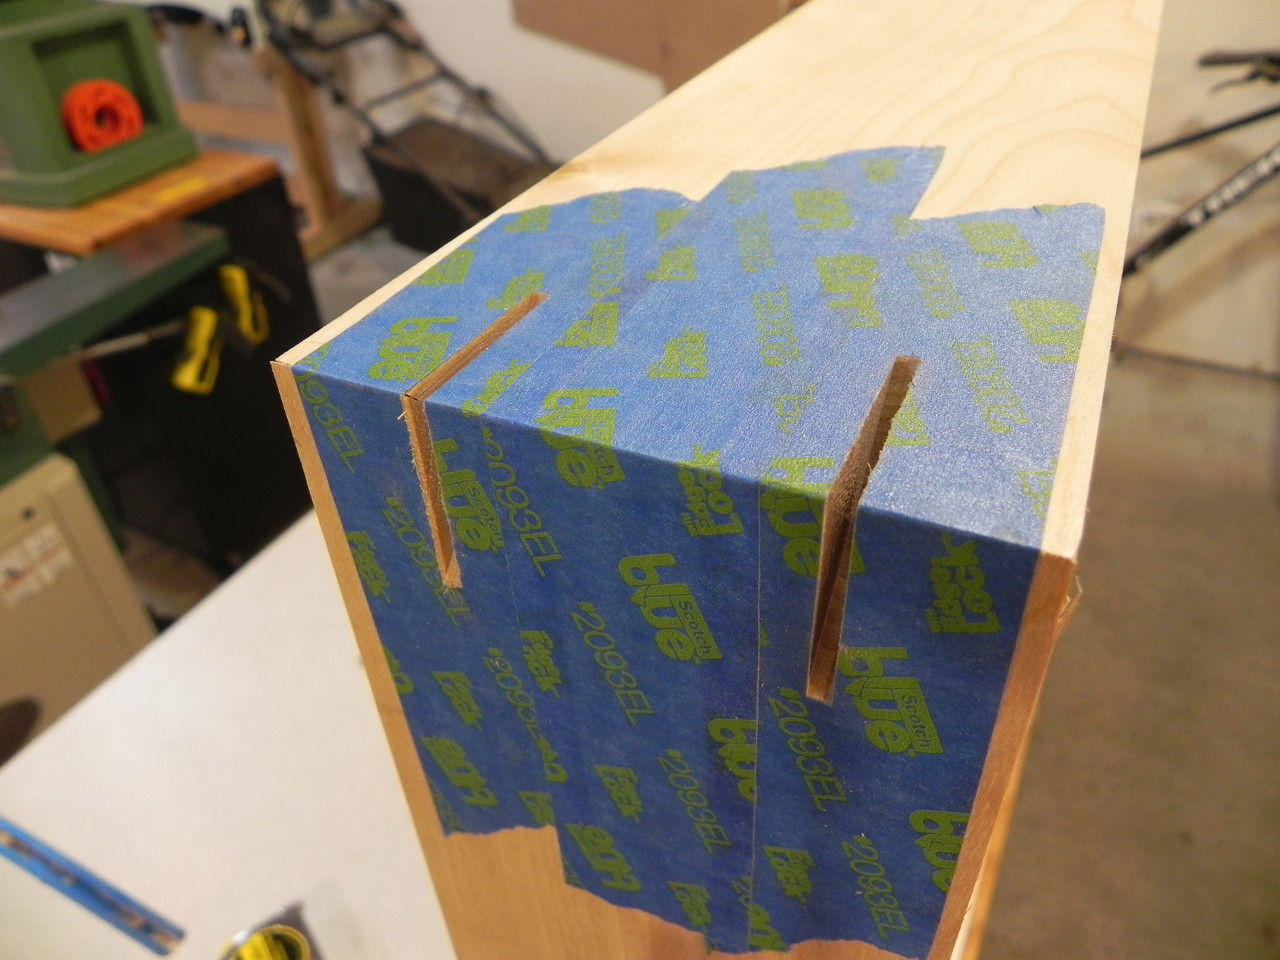
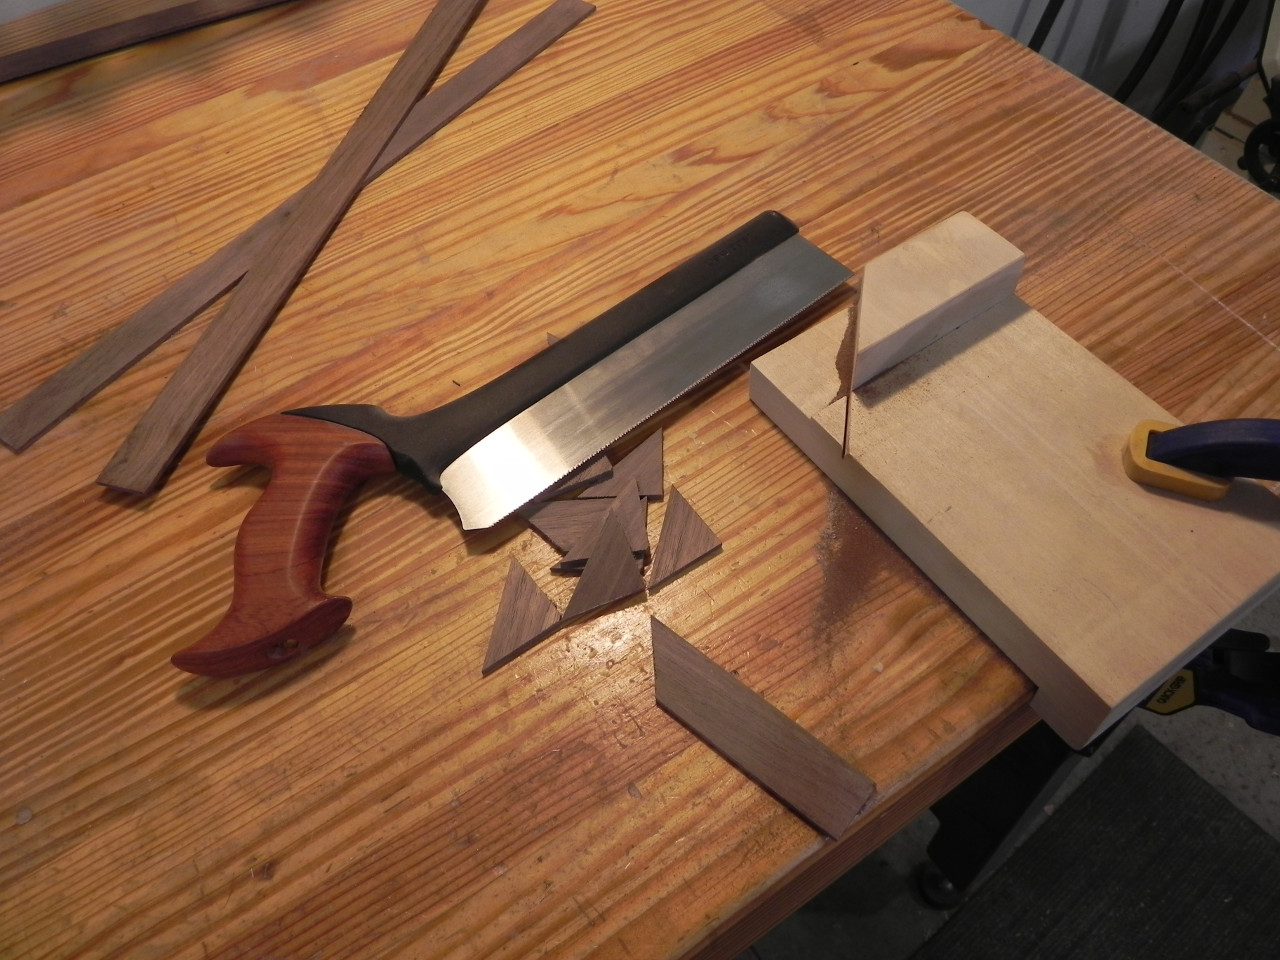
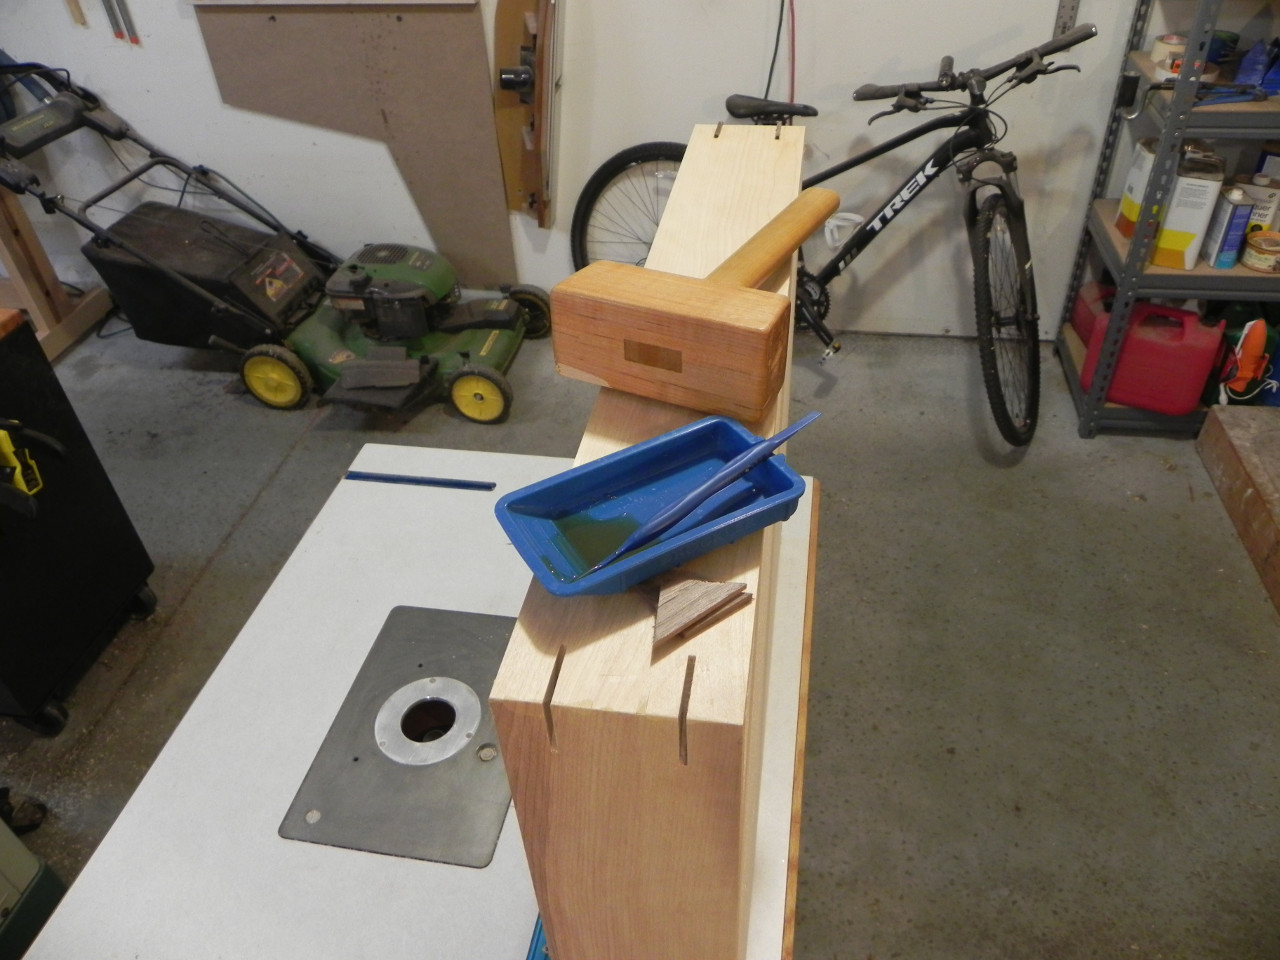
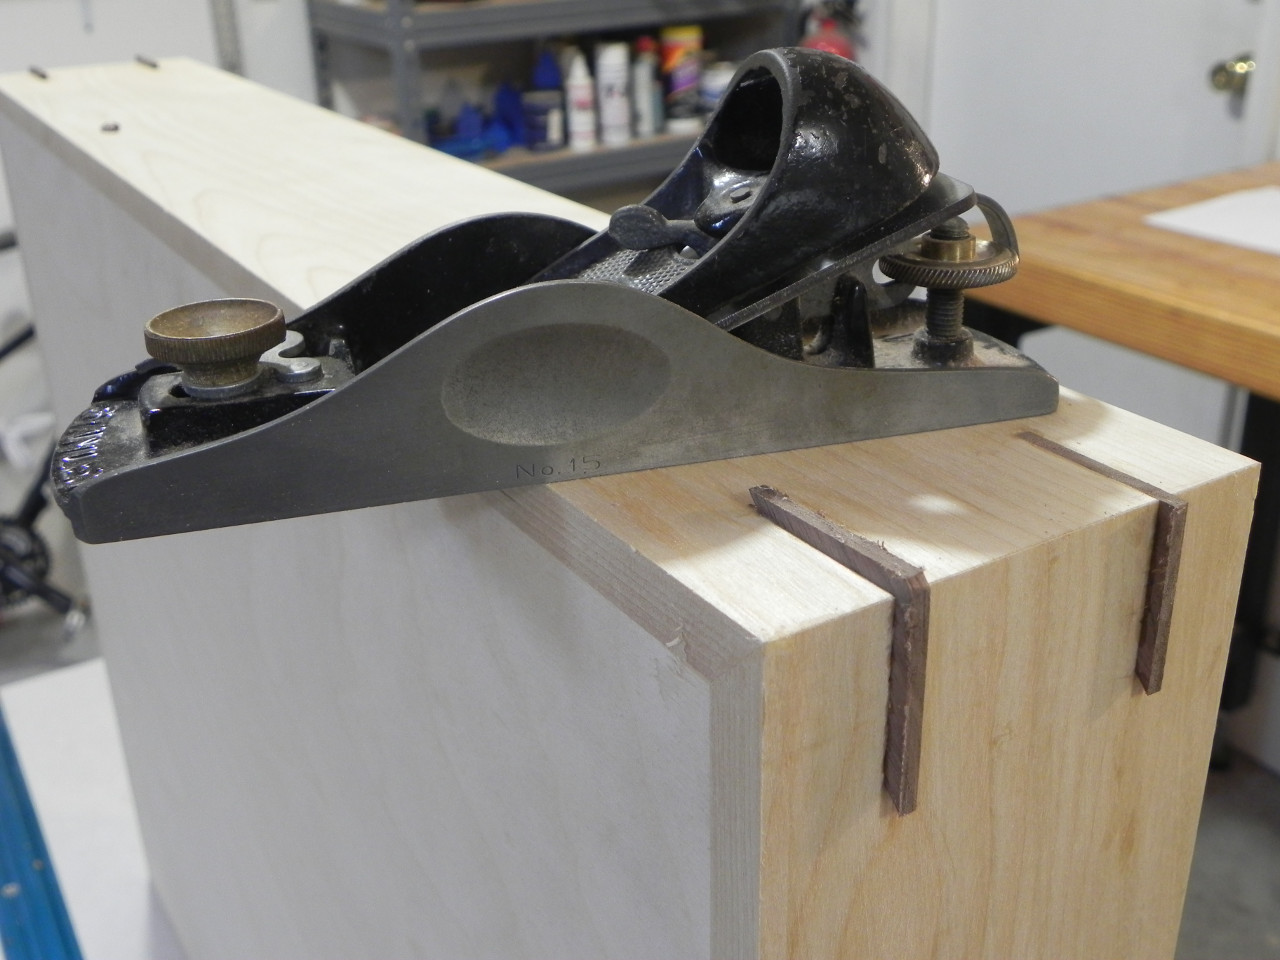
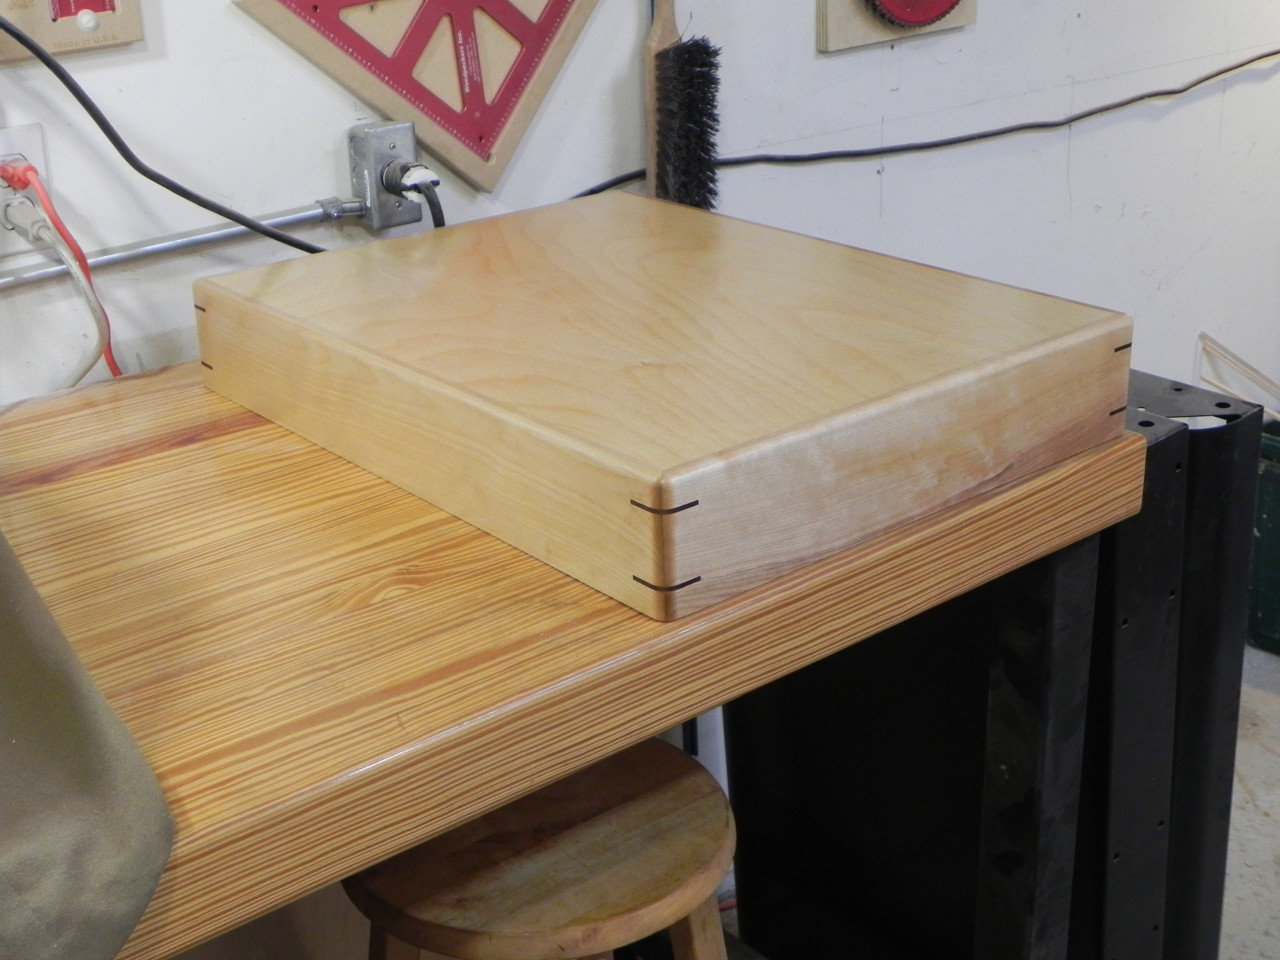
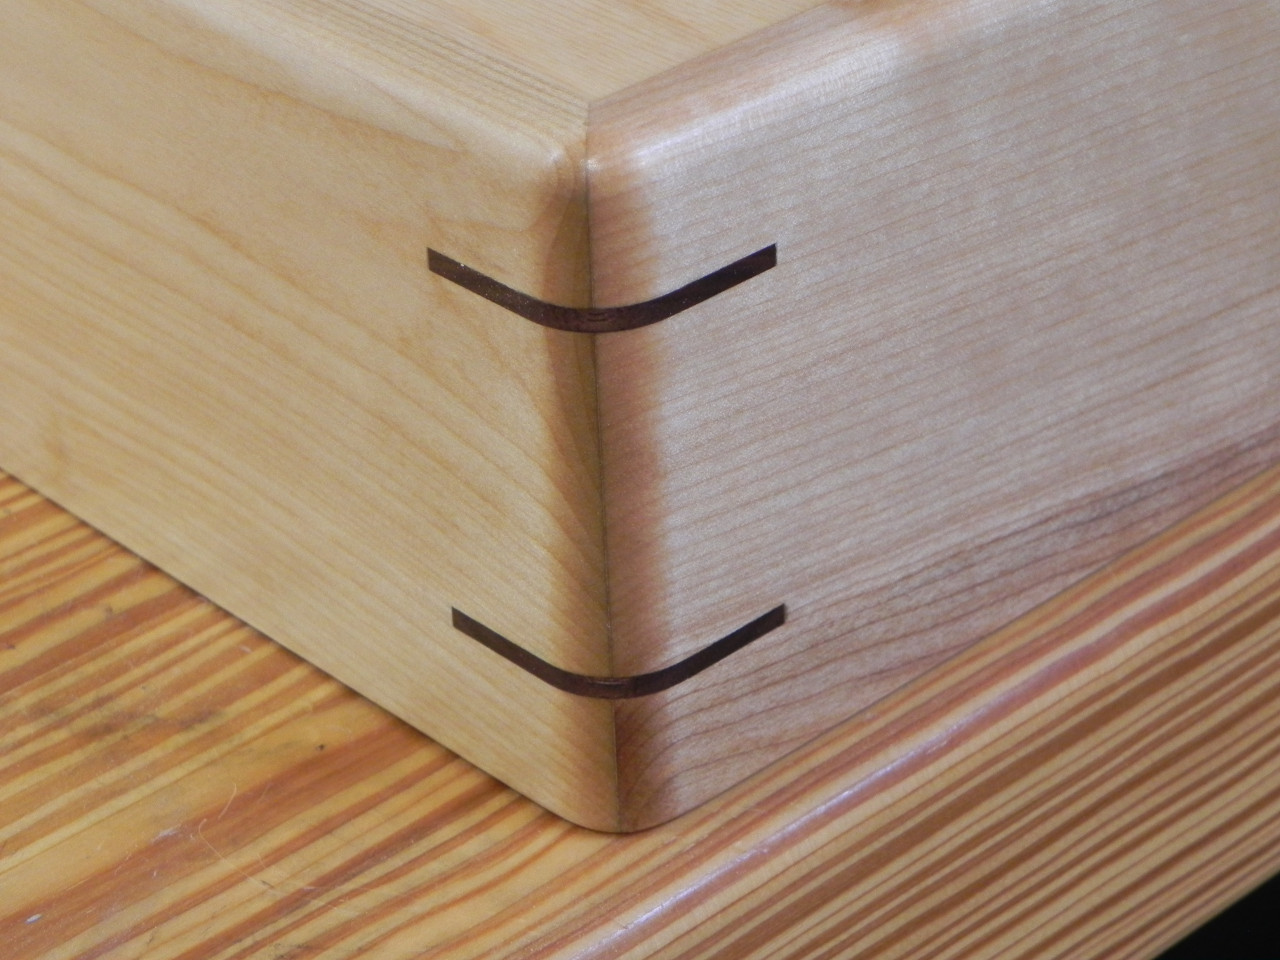
The sides are Birch, mitered at the corners, and reinforced with Black Walnut keys. The top is 3/8″ Baltic birch plywood, that sets flush with the top of the sides in a rabbit. To make it a little more pleasant to handle, I gave the corners a 1/2″ round-over, and all the other edges a 1/4″ round-over. It’s probably a futile gesture, but to try and protect it from the inevitable cutting oil, lubricating oil, and other random things that might get spilled on it, I gave it several coats of a home brew whipping spar varnish.
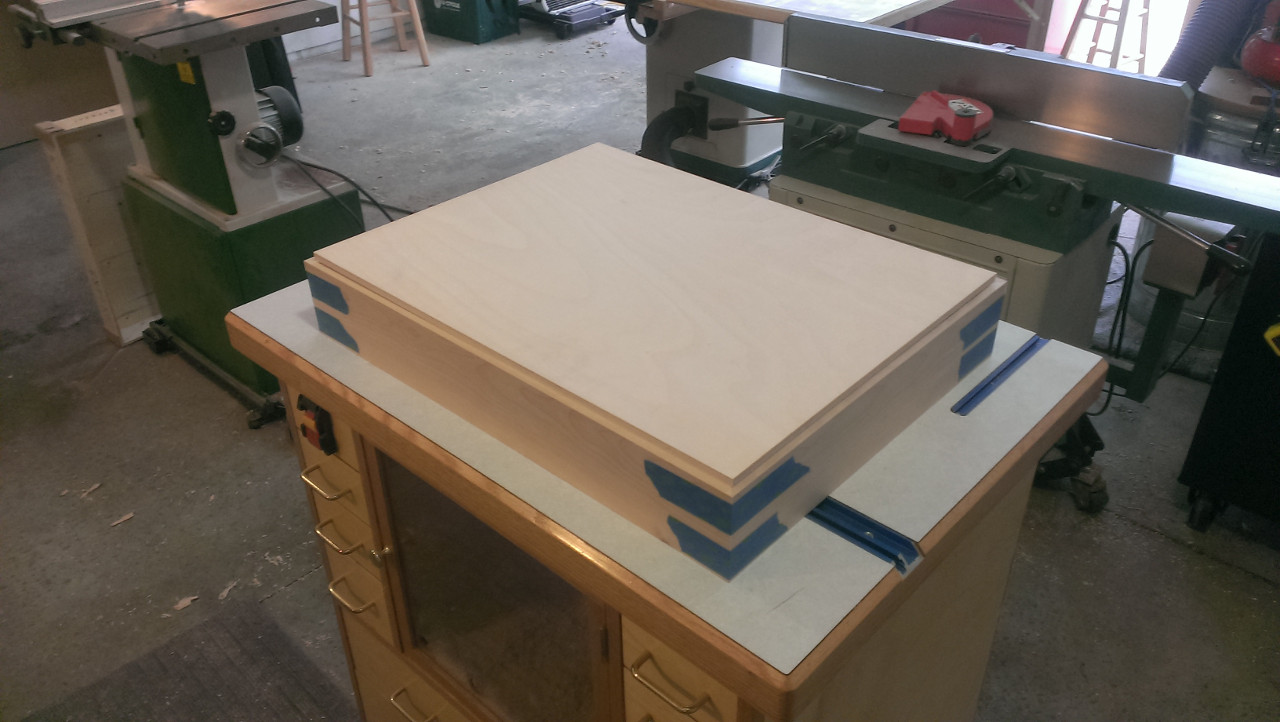
mock-up
The actual construction process only took a few hours, and most of that was waiting for the glue to dry. It was a pleasant mix of roughing the stock to size with power tools, and then doing the fine fitting with hand tools. The trickiest part, was the gluing up the top and sides all at once, to ensure nice tight joints. It took twenty clamps when it was all said and done, so it was all I could do to move it across the shop to dry. Below are some shots of the construction process.

Very impressive work, I was just thinking of a leather cover, but I can see the advantages in using a wood cover. is there much space between the wooden top and the top of the stone?
If memory serves, it’s about a 1/4″ to 3/8″ gap.