Giant crosscut sled
I’m not really sure why, but I have been putting off making one of these for years. Making a cross cut sled is easy, but getting the fence square can be a real PITA (Oh yea that’s why). This sled is a smaller (42″ x 42″), simpler version of the Ultimate Crosscut Sled presented by John McCormack in the July 2008 issue of Fine Woodworking. The actual dimensions of a sled are so dependent on your particular saw and project needs, that it’s pointless for me to draw a plan in sketchup for you to download. The following are some things to consider before making your sled.
- Keep the design simple & use cheap/ scrap materials. It’s a jig and therefore expendable. I’m not saying trash it after a month, but don’t expect it to last 10 years either. If you need to think twice about screwing down a stop block you spent too much on materials.
- Make sure The sled is well supported. When you’re making a cut, you need to be focusing on keeping the piece back against the fence, and maintaining a smooth motion, not juggling the outboard end of the sled.
- Use quarter sawn wood for the runner, as it will expand and contract less (I used White Oak).
- Put a shallow dado in the base for the runner; this makes assembly a lot easier.
- The fence needs to be perfectly strait. By perfectly strait, I mean within a few thousands.
- Build the fence so it’s adjustable, i.e use bolts in over sized holes. This feature really helps when it comes to keeping the fence strait. If the fence develops a bow, loosen the bolts and use clamps or some other method to push or pull the bow out.
Like I said earlier, squaring the fence can be a real pain. While the five cut method takes the guess work out of the process, no tricks exist to make the process go faster. I think it took me about 90 minutes to get my sled to within 0.002″ per foot. Your probably thinking 90 minutes isn’t that bad. Remember, wood moves with the changes in weather. After a month or two of hanging on the shop wall your sled is going to need to be re-squared.
90 minutes of cutting mdf makes a real mess of the shop floor.
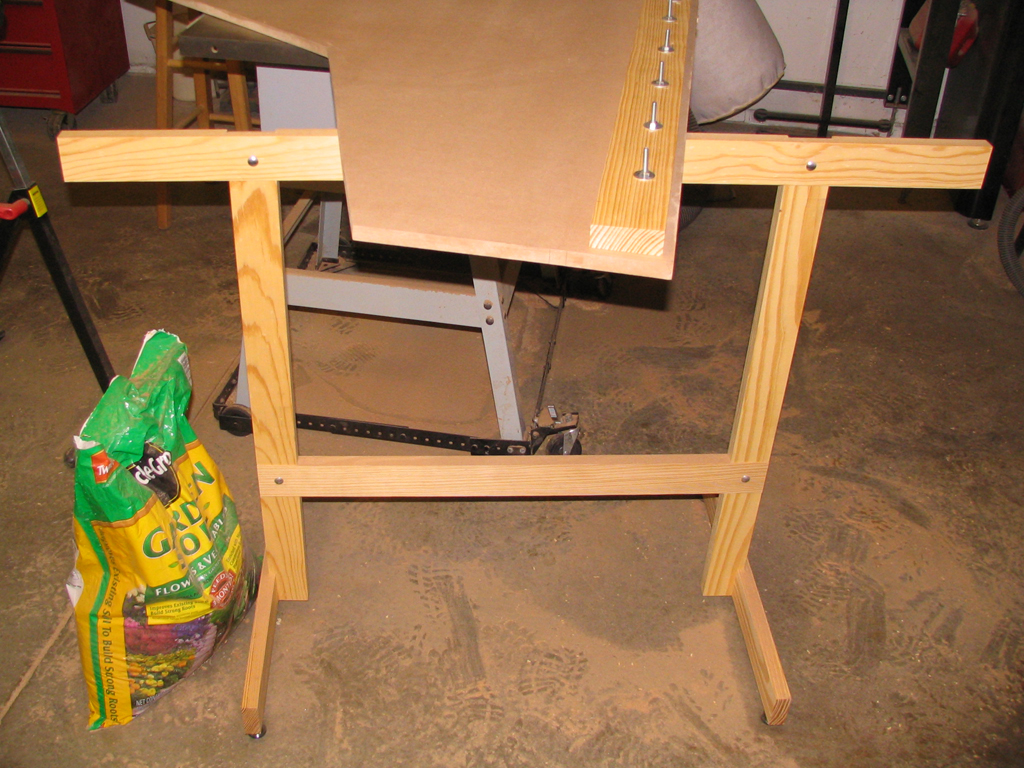
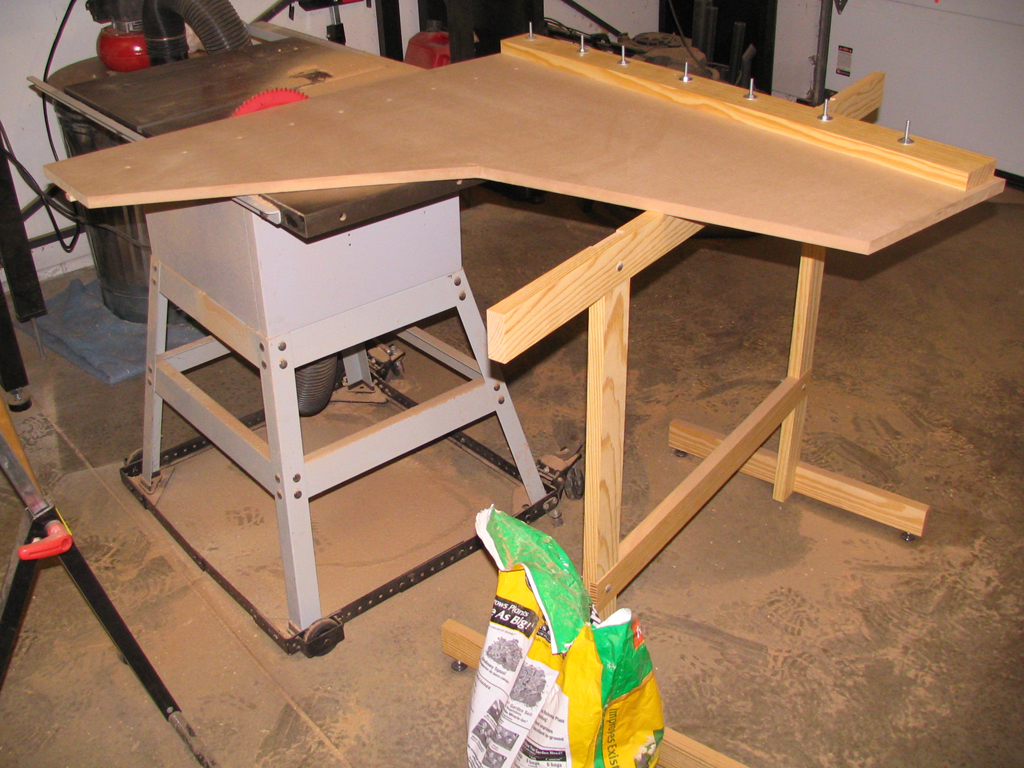
I made this saw horse in about an hour out of some scrap SYP. It's held together with lag bolts so it can be disassembled and hung on the wall, and it has leveling feet so I can level it to the saw top.

This past summer I constructed John McCormack’s ultimate crosscut sled which I fondly call “the Stealth Bomber,” since it resembles the aircraft’s shape and the sled is quite “bomber,” meaning dead-accurate. A couple of problems with the Bomber arose while preparing to build it: I wouldn’t be able to repeatedly cut workpieces longer than five feet and the sled would be heavy, creating a storage issue. So to address the first quandary, I decided to add a telescoping flip stop to the Kreg Top Trak. It slides out from the back of the fence and locks into place with a Festool six inch clamp.
After a bit of pondering a storage solution, I traced the sled on the outfeed table at the opposite corner of the table saw and cut out an embedded and lockable Stealth Bomber hangar or docking station that is flush with the table saw top & puts the sled’s fence completely out of the way of the saw’s ripping path. The lock is a fixed piece in one of the sled’s many hand holds. No need to develop a hernia by lifting the Bomber’s heft off the table saw, just slide it around the outfeed table and land it down into the hangar. The docking station also keeps the sled from being bumped out of square or damaged by lifting off and placing it elsewhere. I squared the fence to the blade once and I have not had to tune it up since.
In addition to McCormack’s adjustable sawhorse supporting the sled on the saw’s left flank, I also use a five-foot infeed rip support located on the right side of the sled’s runner. I am able to safely crosscut 37 inches. I can now quickly, repeatedly and accurately crosscut cabinet parts and trim work. Set-up time takes about a minute. John McCormack’s ultimate shop-made sled is by far the best of its kind and well worth the time it takes to build.
Jamie Lennox
Missoula, MT