Finally 4k Ready
When I started making YouTube videos regularly last year I really wanted to deliver in 4k, but my 2010 vintage computer (custom build), wasn’t up to the task. Thus, in July of last year i set out to rectify that issue. The Machine I came up with was able to burn through 4k content, with one small issue, it quickly ran out of space to store it. fast forward to today, and I now have the storage space issue fixed.
Jillian and I just moved into a new house, so I knew it was going to be a while till I could get the shop back up and running. With plenty of times on my hands I sat down and researched how much more space & speed I would need to do what I wanted. What i untimely settled on is as follows:
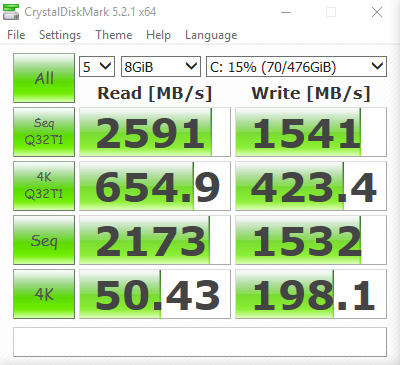
C: 512GB Samsung 950 Pro m.2
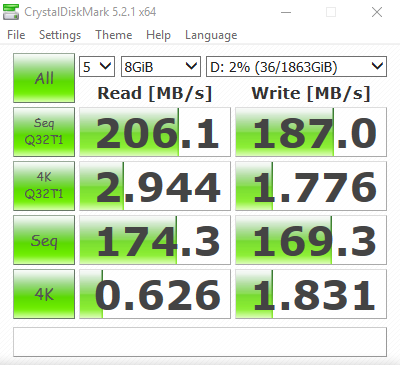
D: – 2 x 2TB Western Digital blacks in software RAID 1
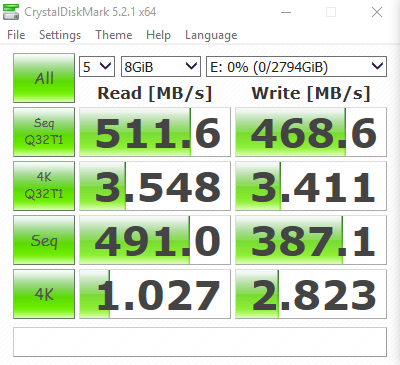
E: – 3 x 1TB Seagate Barracudas in hardware RAID 0
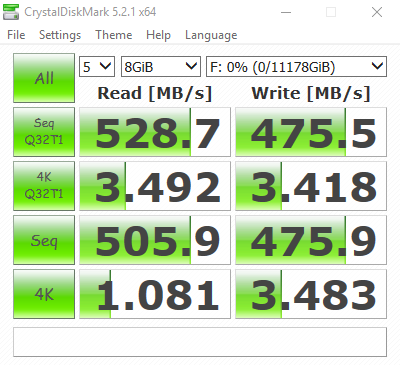
F: – 3 x 4TB Seagate Barracudas in hardware RAID 0
The 950 pro is your typical C drive for application files. The 2 WD blacks in RAID 1 are for long term storage of my important files, like source code, photos, and personal documents. it also acts as a short term back up repository for the source files of my current video project. The two Raid 0 drives are dedicated to video production. They aren’t equally sized because of my current workflow, and needed to be 3 drives each to provide enough I/0 to not bottleneck the cpu or gpu. The CrystalDiskMark benchmarks show what each “Drive” is capable of.
Over the last year I’ve crafted my work flow to be as fast as possible, and it currently stands it works as follows:
- Copy the raw source files from SD cards to the D (back-up copy) & E (working copy) drives.
- I Use FFmpeg to pull the raw audio streams out of the working files, and write them to a directory on the F drive.
- I Use Auphonic to optimize the raw audio streams, and write them to a directory on the D drive.
- I again use ffpmeg to trans-code the raw h.264 video files in DNxHR HQ and overwrite the original audio streams with the optimized ones. The new optimized source files are written to the F drive.
- I edit the optimized files using Davinci Resolve and then master to DNxHR HQ that gets written to the D drive.
- I again use ffpmeg to trans-code the masterd file back to h.264 for uploading to YouTube.
It’s not the simplest workflow, but its the fastest do to the fact that Davinci Resolve 12.5 is not very good at encoding or decoding h.264. Resolve’s inability to handle h.264 well, is why I have to create optimized DNxHR files to edit, and also why I need need so much storage space. 4K DNxHR is 104 MB/s at 30p and 208 MB/s at 60p, so if you do the math you can see how you can burn through space and i/o quickly.
As a side note the reason I bounce back and forth between E and F drives, is to squeeze every last ounce of read/write performance out of them. Hard drives can loose as much as 25% of their efficiency when you read and write to them at the same time, and by using my workflow I can avoid that.
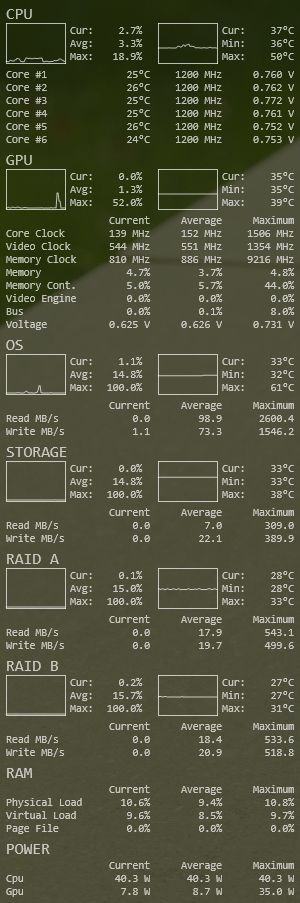
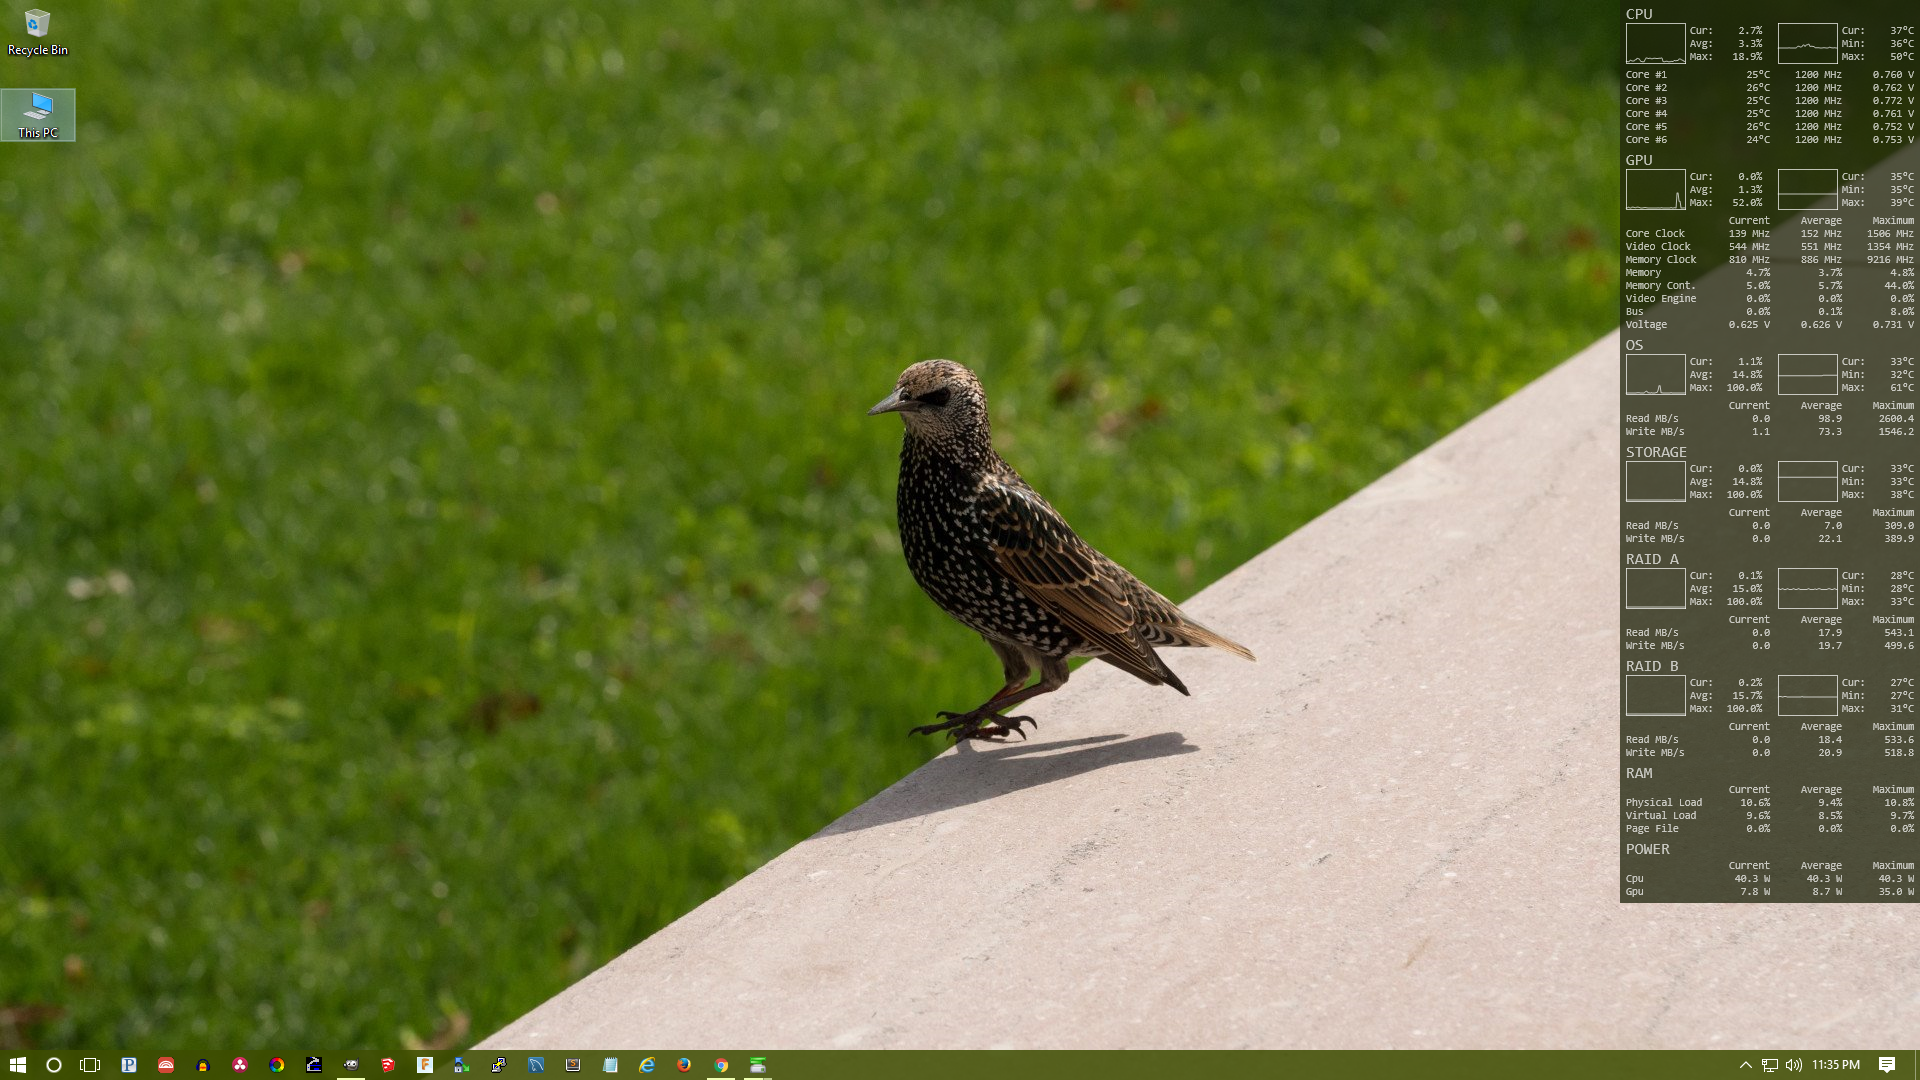
As you might image, my machine isn’t your average desktop. It’s more of a thoroughbred racehorse, and it can be just as temperamental if not closely watched and cared for. To keep an eye on the system I’ve been using a combination of HWiNFO and Rainmeter to generate the custom desktop display shown below.
Hopefully now that the house is almost completely unpacked, I will be able to get back out into the shop and start filming so I can put all this processing power and storage space to good use.
