Making a bandsaw throat plate
Bandsaw throat plates and tables saw inserts, both play a significant role in determining how much tear-out is created during the sawing process, but bandsaw throat plates receive very little lip service compared to their more common brethren. I assume this is because bandsaws aren’t as common in home shops, and in my opinion aren’t used as extensively by your average weekend worrier as they could be. I use my bandsaw almost as much as I use my table saw, and thus have put a decent amount of effort into extracting every last bit of performance from it.
When I got my saw, the optimization I struggled with the most was minimizing tear-out. I tried everything from different teeth grinds and TPI counts, to a zero clearance auxiliary top. The auxiliary top did a great job of preventing tear-out, but it was cumbersome and made using the fence impossible. Recently it hit me, all I needed to do was make a better throat plate. I’m slightly embarrassed to admit I didn’t think of it sooner, given what I know about table saw insets and their benefits.
The stock plate sits a good 64th below the top, and the throat was at-least 1/4″ wide. Thus, while it does a good job of preventing debris from following into the lower guides, it does almost nothing to reduce tear-out. I considered buying an aftermarket plate, but after examining several in person I wasn’t impressed. The ones I looked at all seemed flimsy, and to thin to for my tastes, so I decided to make my own. I decided to make it out of UHMW Plastic that I picked up at Rocker. It’s easy for me to machine to a tight tolerance on my metal lathe (could be done on a wood lathe as well), and it won’t damage a blade that hits it during a cut.
The first step in making the plate was to take measurements off the saw top. For my saw the plate need to be 0.203″ thick above the rabbet, and 2.75″ in diameter. Some times I wonder what the engineers are thinking when they design a component, as the plate diameter is a nice round number, but the thickness is a real odd ball.It could possibly be a machining error, but its pretty far away from a common dimension.
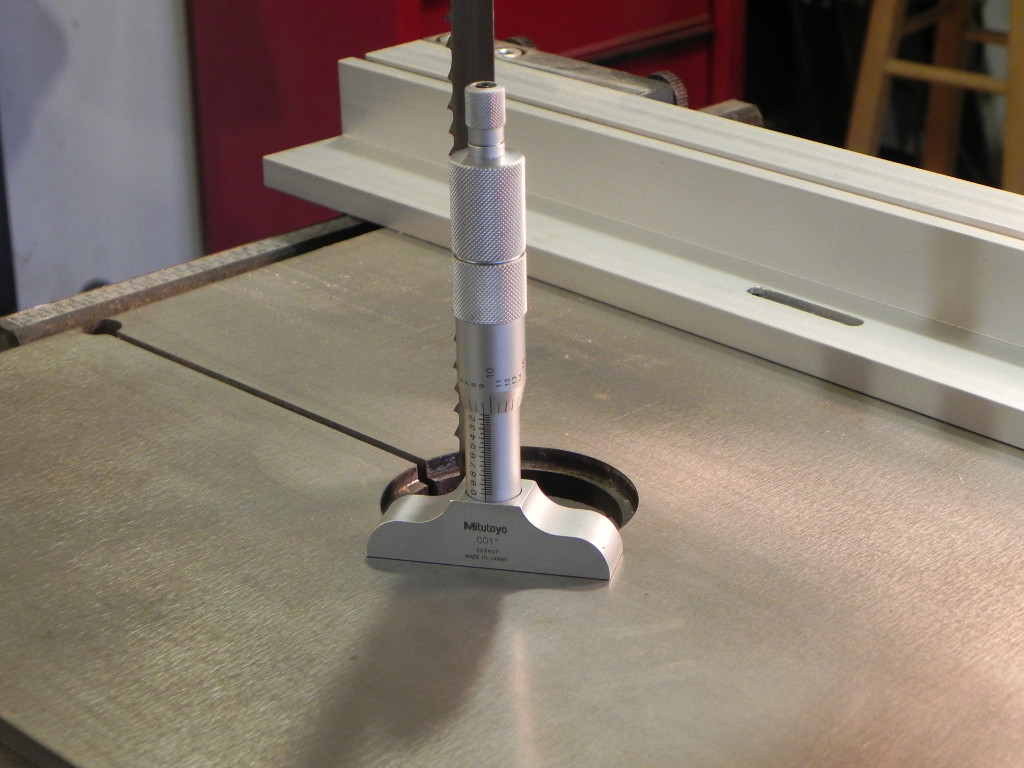
Measuring the plate Thickness
To machine the plate I drilled a hole through the center and mound it on a 1/4″ bolt that threaded into a chunk of scrap held in the chuck. While it wasn’t an overly rigid setup, it allowed me to test fit the plate and then re-center it in the lathe within the tolerance of my chuck. While I didn’t take any shots of the actual turning process, it went fairly well using HSS tooling ground for aluminum. The only real issue was I needed to take light cuts. If I tried to take a deep cut, the UHMW would start to smear and leave a horrible finish. The final step in making the plate, was to cut the blade slot. I could have done it using the bandsaw itself, but decided to do it on the table saw. My 50 tooth combo blade left a clean finish and a slot only 1/8″ wide. I didn’t think about it till later, but if I had used a 7-1/4″ blade the slot would have only been 1/16″ wide. I’ve got plenty of extra material, so I’m sure I’ll play around with different widths.
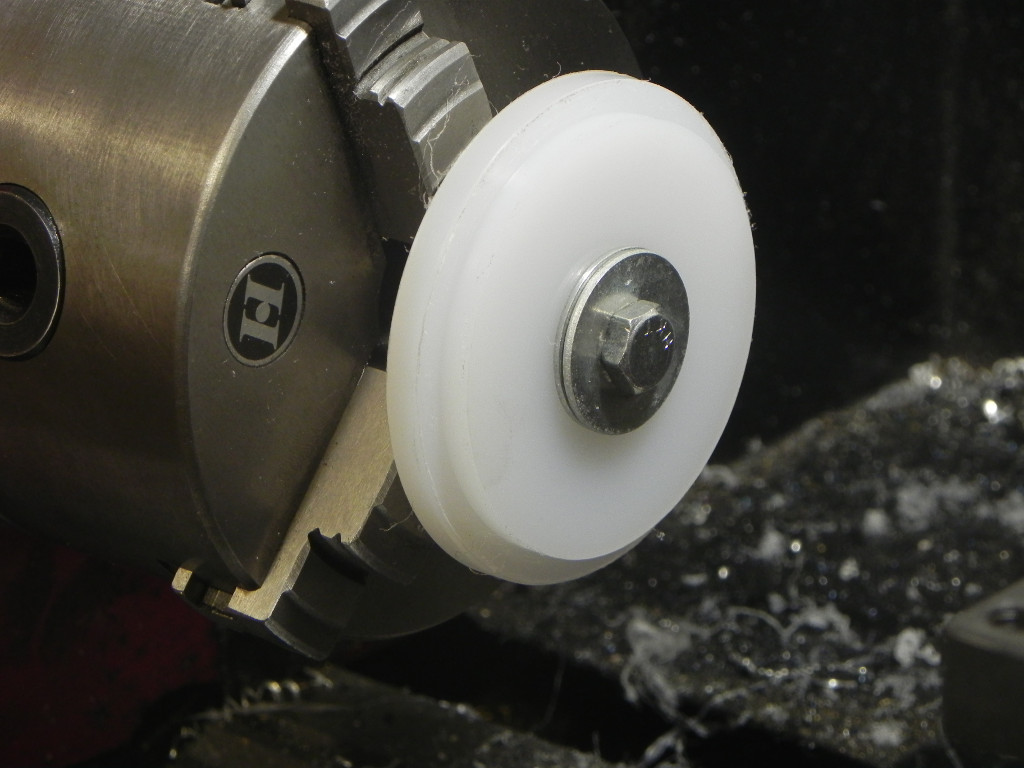
Turning the plate to size
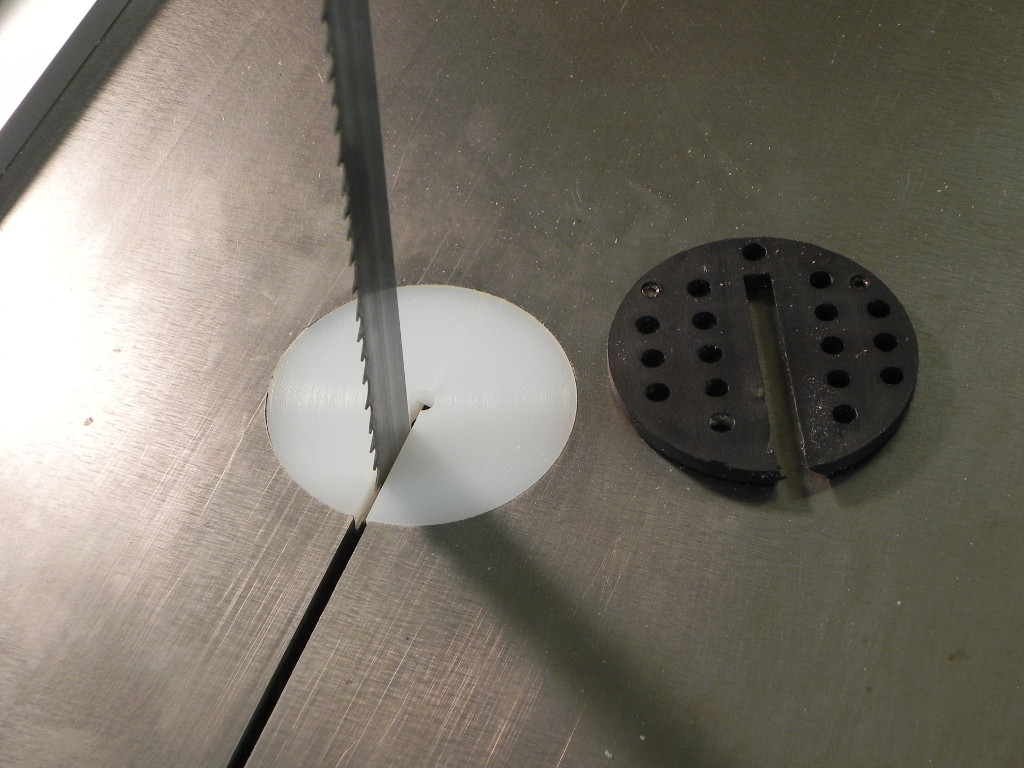
fitted and ready to use

I assume that the reason for that odd ball .203″ dimension you mention is because that table is cast, then they flatten the top of it on a milling machine. That grinds away the rough casted surface to a nice flat one. That process results in that rabbet being .203″ deep.